Showing posts with label Sparkle N Sprinkle. Show all posts

Tuesday, November 11, 2014

More Christmas cards from the sale

Here's the second installment of
Christmas cards from the weekend's
craft sale......
 
 
This is from a Sparkle N Sprinkle set,
with the snowflake a die cut from Spellbinders
and cut out from SU Glitter paper and layered.
The swirl and greeting are embossed.

 
Santa is another image from my sister's stash, but I
think it's Whipper Snapper...
greeting from SU.

 
An adorable set of snowmen from Penny Black....
the "ribbon" is Scor-tape with semi-transparent glitter
on it.....
 
All image colored with Copics...
 
The craft sale attendees like simple cards with
flat embellies - so had to control myself LOL...
 
Brenda


Wednesday, July 16, 2014

Mommy & Daddy

A little mommy & daddy time
with a little of Charlie thrown in
for good measure.
 
 
Good times with Mommy


More fun with Mommy
and flowers made with
Spellbinders dies and
Stampin' Up punches
and designer buttons.

 
Special times with Dad & Charlie

 
Special times with Daddy
 
The Mommy & Daddy on two of the pages
were done with chipboard pieces that
have been embossed with Sparkle N Sprinkle's
Cosmic colors using the Batik Embossing
technique and with a little Magic Speckle
added to make them look like ceramic pieces.
 
Hope you've enjoyed these :)


Sunday, April 20, 2014

Golf Golf Golf

Had some extra images
left over from all the golf
sticky note holders that we
made, so decided that
I'd make a birthday card too.
The image is from Art Impressions
and the greeting is from
Sparkle N Sprinkle.


Tuesday, April 15, 2014

Lovely Lady

This lovely lady from
Sparkle N Sprinkle is
perfect for Mother's Day
or even a Birthday.
She's so fun to color.
I used my Copics
and Spellbinder Dies.
 
 
A beautiful embossing folder
from Couture Creations
and gorgeous DP from G45's
Secret Garden complete the picture.
Hard to see here in the photo, but
it's accented with a clear glitter gelly roll pen.


Friday, April 11, 2014

Tulips in Bloom

I'm sure it's not coming fast
enough for all you folks
that have had such an awful winter,
but these tulips are such
fun to color.  They're from
Sparkle N Sprinkle and I've
blinged them up with a little
Sparkling Snow Glitter.
A pretty seam binding bow
and some beautiful navy and
cream DP from My Mind's Eye
Lush Paper pack completes the picture.
Colored, of course, with Copics.


Friday, March 28, 2014

Hoppy Easter

Hoppy Easter!
Here are a couple of cards
that I made for Easter that
fall under the keep it simple policy.
 
 
This is an old image from Imaginations
and it just fits the old Spellbinder Ornament
Die so well (used as a carrot)....
The white on white background was done
using an embossing folder from Provo Craft.


Another old Imaginations image.
The little row of flowers is from
a set by Sparkle N Sprinkle.
The Embossing folder used was
from Sizzix.  A little magic mesh and
some SU punches and Spellbinder dies finish it off.


This darling little image is by Penny Black.
The embossing folder is from SU
and the dies from Spellbinders.
Copics were used on them all.
 
Thanks for checking in with me.


x_3c4431a5 photo x_3c4431a5.gif

Tuesday, March 18, 2014

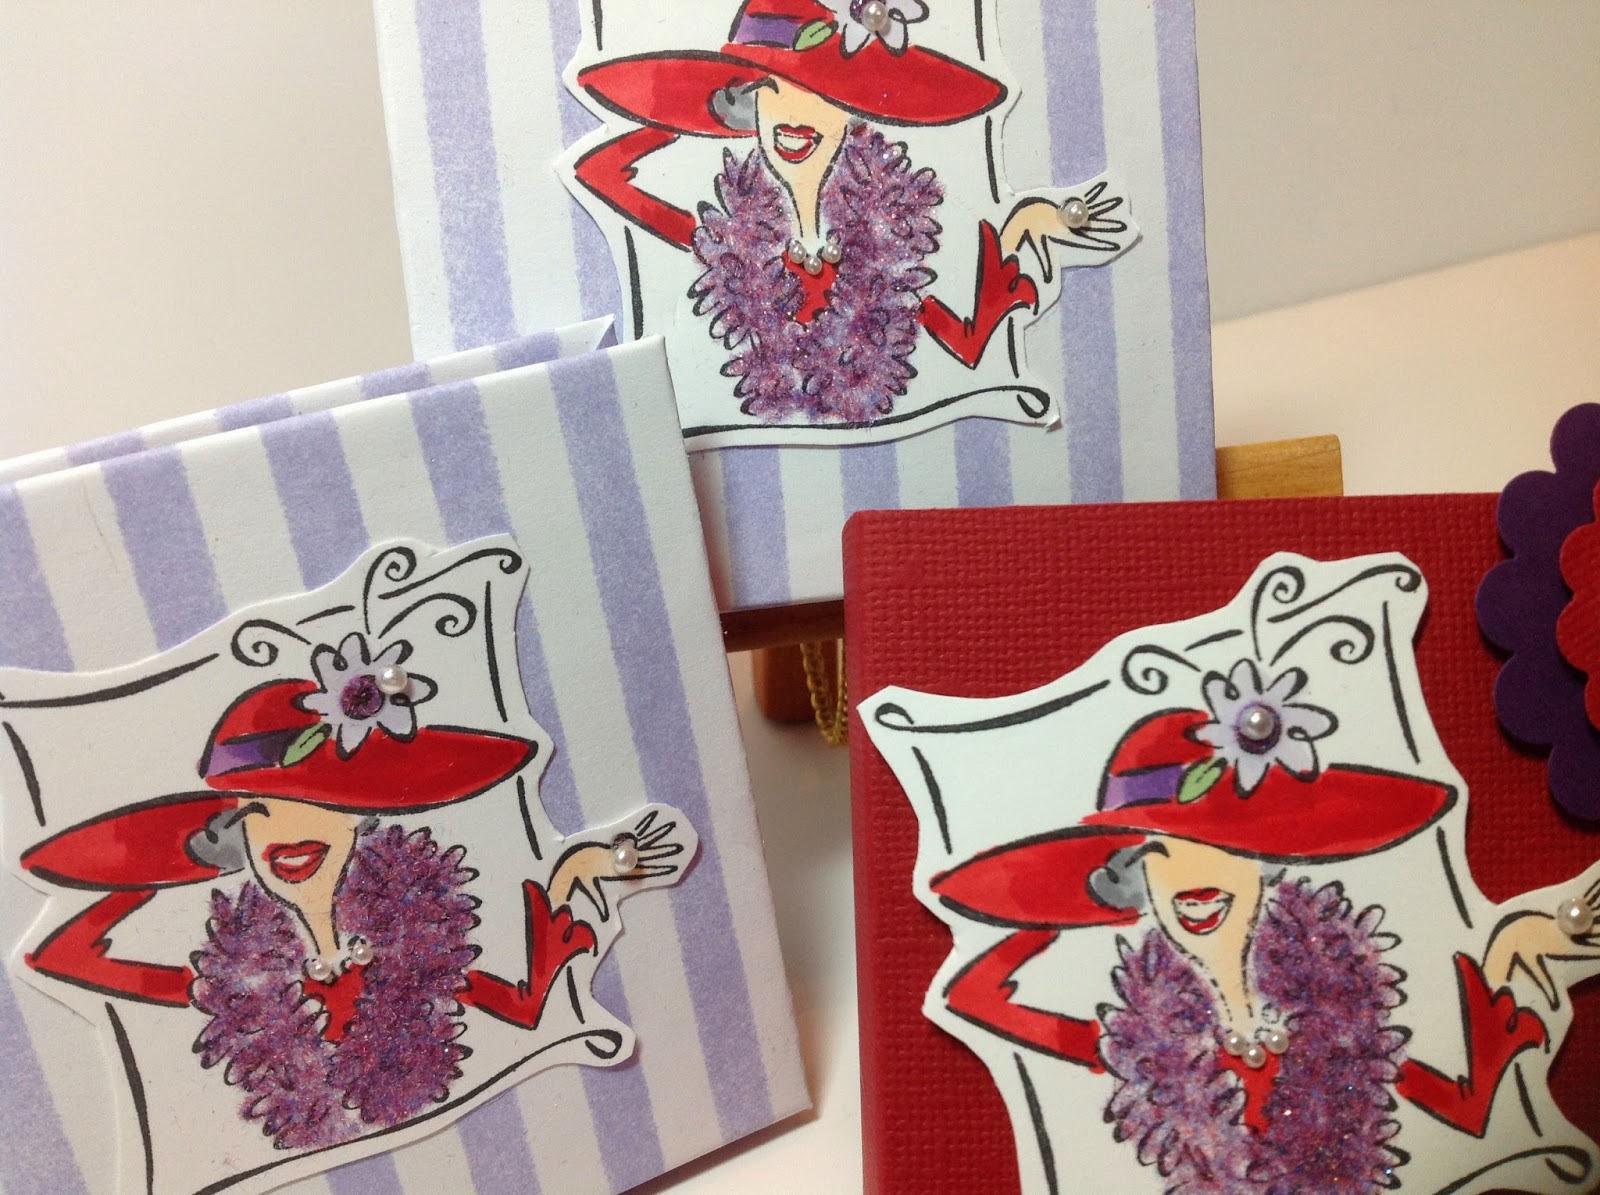
Red Hat Lady Post-it Note Holder

 
I had so much fun making the first
post-it note holder and box set,
that I did another.  This time
I used an old Stampin' Up set
and did it like the Red Hat Ladies.
The boa is done with Sparkle N Soft
from Sparkle N Sprinkle.


Thanks for checking in :)


Wednesday, February 26, 2014

Phase IV - Pinwheel Album

This is becoming quite the project LOL.
I'm still basically on phase 3, but
it's slow going.   Here are a few more photos
and I still have another full section to do
pockets and tags for before I
venture into the final "bling" phase.


Here' s the top of the blue section
where I added another pocket using
one of the big flowers, but used it
in conjunction with a blue background
instead of a stand-alone.
Used a Spellbinder's die for the tags.
 
 
Here's the first flip out of the blue section.
I've added decoration to the pocket
and two tags decorated with a punched
out area. More on the funky flower in a bit.


Here's the blue section partially done
and opened up.  There's a tag
under the flower "pocket" and
a tag in the big pocket.
 
 
Below are four chipboard flowers
that I've had for eons.
They've been embossed several
times each with a couple of different
embossing powder colors
and finished off with Magic Speckle
to give them an enameled look.
All the EPs are from Sparkle N Sprinkle.
While the EP was still hot I pressed
a stamp from Sparkle N Sprinkle's Swirls Set
into the hot EP to give it texture.
The paper flowers on top were cut out
using the Spellbinder's Rose Creations die
and topped off with Stampin' Up stick on pearls.


More to follow in a few days...


x_3bfa0be9 photo x_3bfa0be9.gif

Thursday, January 30, 2014

Yummy for Your Tummy


Here's an oldie, but goodie...
Love the little milk cartons and
the little carry box to hold the set.
 
 
The cute little birdie is a Judith image
and the greeting is Stampin' Up.

 
The Jelly Bean phrase is from Sparkle N Sprinkle.

 
Here's a close-up of the milk carton....  once I got
started, they were quite easy.

 
The little birdie was "fluffed up" using
Sparkle N Soft flocking from Sparkle N Sprinkle
and adhered with a Sakura Glue Pen.

 
Here's a photo of the four milk cartons
and their handy-dandy carrier.
 
You can find many various tutorials
for these milk cartons if you look around
including one by Beate Johns on Splitcoaststampers.com
 
Fill them up with candy or other
treats and they're perfect
for Valentine's Day, Easter
or any other event..
 
Thanks for stopping by...


Friday, January 3, 2014

Off to the Beach

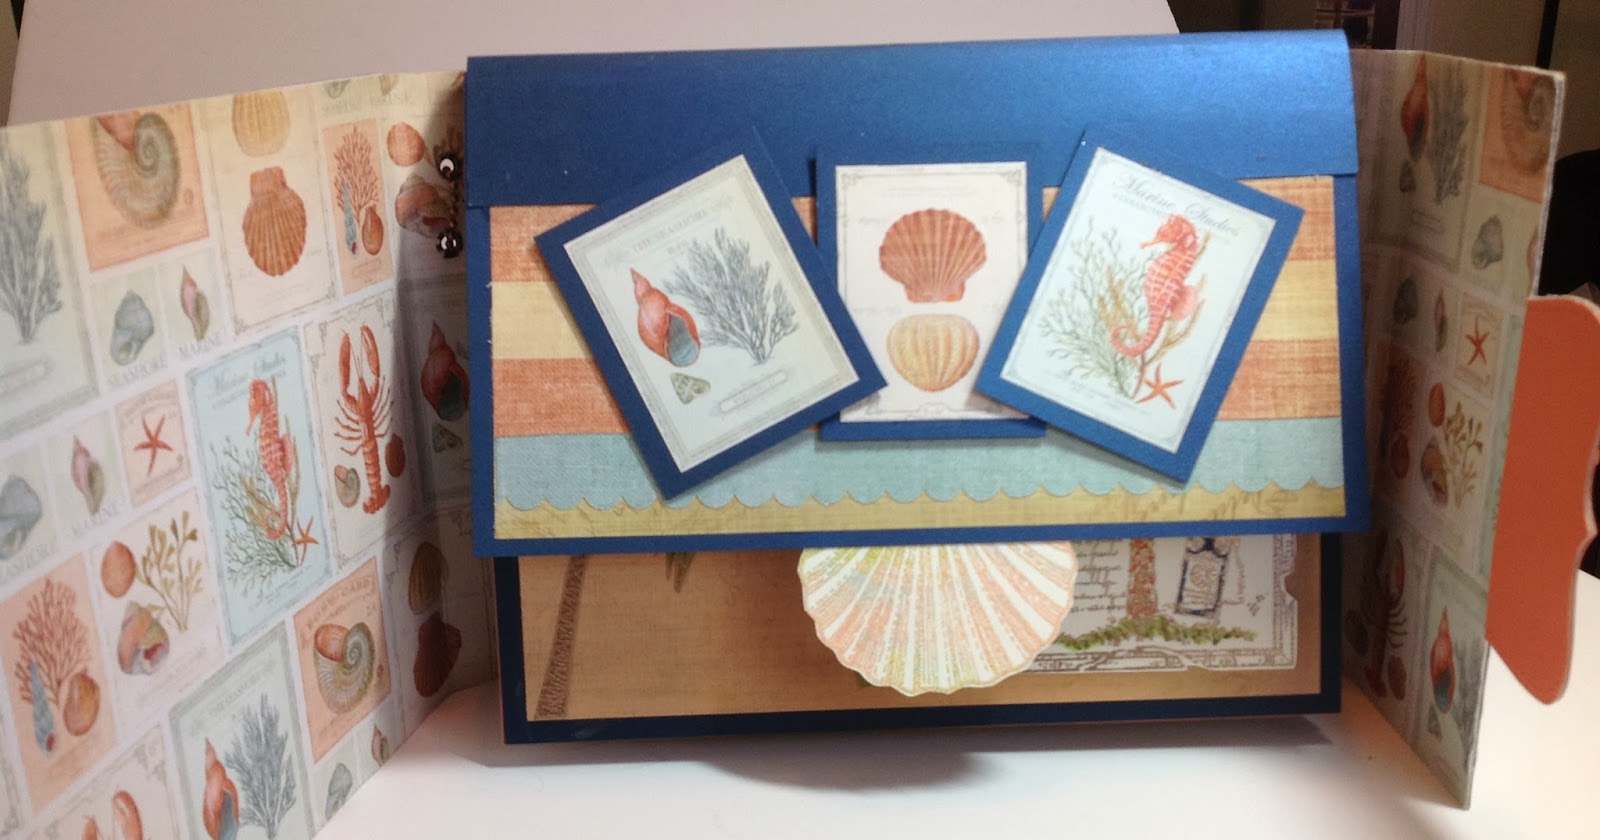
Here's a second album that my sister, Lynn and I did while she was visiting.
It's an album that we've both done before, but wanted to revisit.
It's called back to back bookbinding and I did one last year
with a European vacation theme that you can find
in a previous posting.
 
This one has a beachy theme.
I used basic kraft CS for my unifying theme and
the papers were from The Paper Studios Beach House collection.


Here's the cover.... it has a magnet closure.


I added a band of CS to the top of the pages to give it a more clean look.
 
 
This is a view when the cover is opened.

 
The pull-tab is a stamped & embossed image of
a scallop shell from my collection.
The stamp is from Stampa Tampa (1995)
It was embossed using the "batik embossing" technique
and embossing powders from SNS's Cosmic Collection.

 
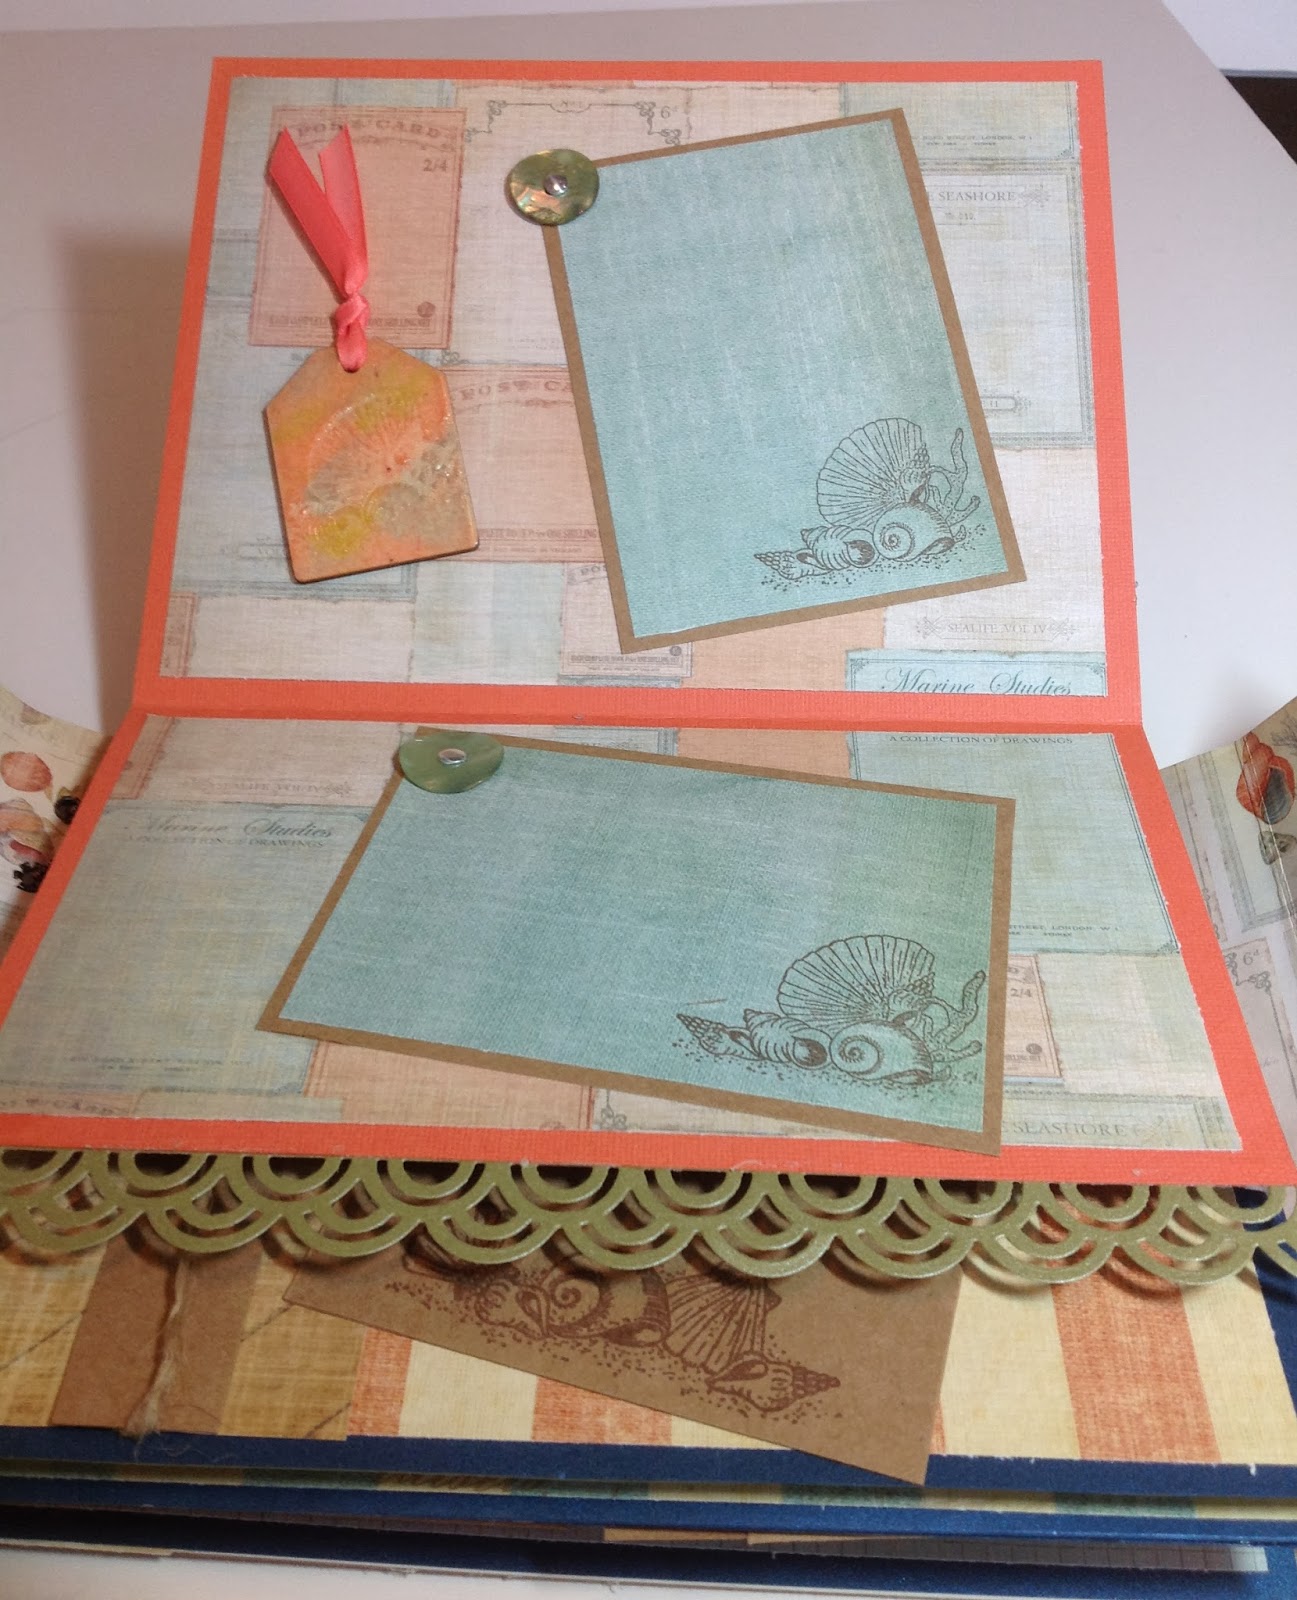
My "corner" pocket was created using a stamp from
Stamper's Anonymous, embossed with Antiquities
again from SNS.  The various other palm trees were from
Under the Rubber Tree, Viva Las Vegas &
Rubber Stamps of America.

 
The stamp image on this page was from
Me & Carrie Lou and the buttons were
kind of cool - shell-looking from my collection.
The tag was wood and embossed using the Cosmic EPs
from SNS and overlayed with Magic Speckle and
stamped using the stamp image as on the panels.
Ribbon from May Arts.
The scalloped border is Spellbinders.

 
Here's a close-up of the tag and button.
 
 
The small palm tree embellie on this page was
created with another wooden piece and embossed
the same as the tag above.

 
Here's a close-up - the palm tree was stamped
while it was still molten and the stamp was inked in black.

 
Bling by Zva Creatives and the palm tree
images are by Rubber Stamps of America
and Viva Las Vegas.

 
Buttons from SU and the image
from Viva Las Vegas.

 
Shell tab is the same as the previous tab, but
with the addition of the button embellie.
The image on the pocket is another by
Me & Carrie Lou....   Oval punch and
scalloped border from SU and tab punch by
We Are Memory Keepers.

 
Here's a close-up of the shell tab.


Close-up of the pocket.

 
Close-up of the inserts.  Palm tree images by
Rubber Stamps of America & Stamps in Motion (1996).
I think this turned out to be my favorite page...
just love the color combo.

 
The last page....
 
 
Hope you enjoyed a day at the beach.


Related Posts Plugin for WordPress, Blogger...
Blogging tips