Showing posts with label sizzix. Show all posts

Friday, March 14, 2014

Lollipop Land

Getting ready for my Stampin' Up party
next week.  I needed an idea for
hostess gifts and my friend, Nancy
(also my SU rep) had
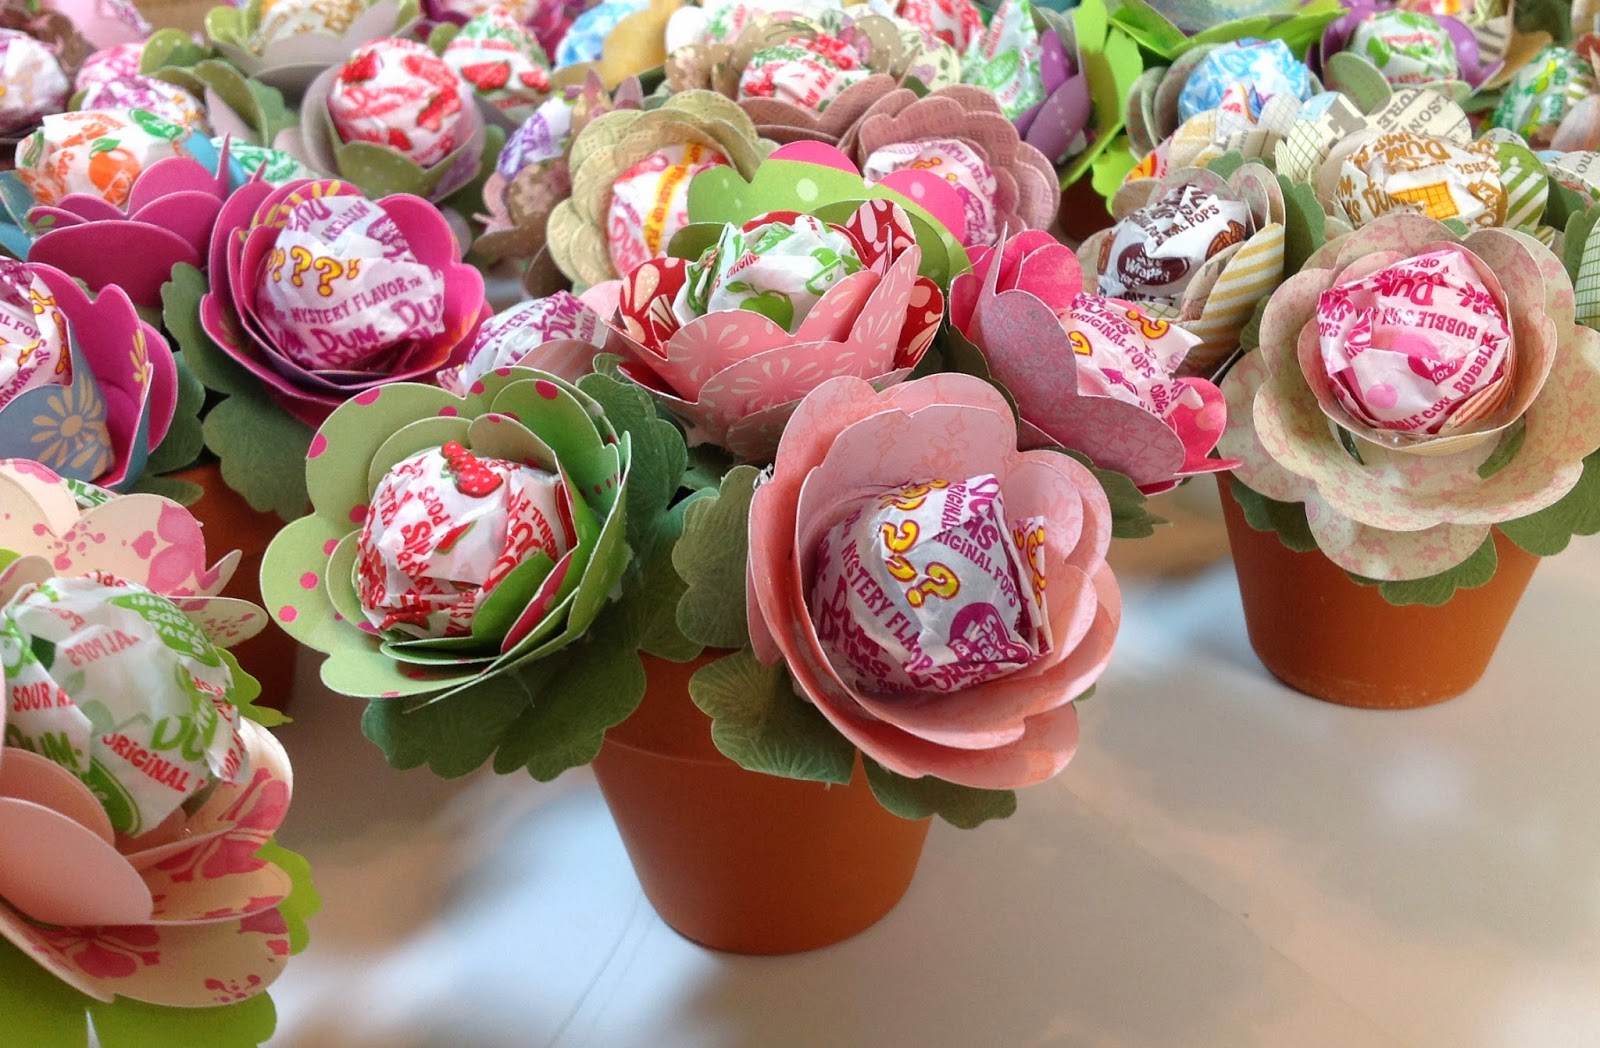
made one of these adorable
lollipop bouquets as a door prize
at the last party! 
VOILA!!!  There was my idea...
 
They are so fun and easy to make.
I used small terracotta pots, a small
foam ball inside to hold the lollipop
sticks, some "grass", the SU Posie punch
for the leaves and the SU Sizzix Spiral
Flower die for the flowers.
Add a bag of dum dum lollipops and
they're good to go.
 
There are several examples you can find
on-line, but the one I looked at didn't
use any kind of adhesive on them.
I opted for some Helmark Craft Glue
just to hold them together better.
 
 
I ended up making 21 of these, but gave
my friend, Patti one as part of her
retirement gift.   She loved it.

 
Here's a close-up of the top.

 
This one and the one below
are even closer  and
show the pots.
 
Here are the two basic tools you need.

 
Hope you enjoyed a visit to lollipop land :)


Klik hier voor meer gratis plaatjes


Tuesday, January 21, 2014

Pink & Brown

I saw this cute box idea on a blog
I follow and went to SplitcoastStampers.com
and got the tutorial, but can't for the life
of me remember who I got the idea from :(
If it was YOU - thanks bunches!!!
It's another easy-peasy fun to do project.
 
Again, I made it simple as it will
just be my "prototype" for a
possible future class project.
I plan to do more boxes and those
I will make a little more elaborate.
 
I always try to make something a little
more "plain" the first time out
of the box (no pun intended LOL)
so that I have it for a sample to work from.
 
Here's my prototype.
 
 
The box was created using pink and brown CS from SU.
I attached the pink and brown decorative panel
together and then used a Sizzix (SU) embossing folder
to give it texture.
The greeting is also from SU from the Oval All Stamp Set
and punched with the SU Label punch.
The brown velvet brad was from Creative Imaginations.

 
Here's a close-up of the embellies.

 
The inside of the box has space for candy!  Yippee...
The tutorial shows 5 Hersey Kisses,
but, unfortunately, I ate them all before I made the box.
The greetings are more SU images
and as you can see, there's a slot for a gift card.
The decorative "slot" w as using the
SU Labels punch.
I also opted to use a corner rounder on the pizza box
type cover and used a Velcro dot to hold the
box together.  You can see that it "pouches the box out"
and for future boxes, I would use a ribbon tied around
the box as a closure instead.
I'd also go a little fancier with my inside too
depending on what the occasion was.
 
Hope you enjoyed my "prototype" for this fun project.


x_3c440cb0 photo x_3c440cb0.gif

Friday, November 29, 2013

Gift Card Purses

Here are a couple of gift card purses for holding
either a gift card, candy or other small gift.
 Check under my Templates section to see the instructions for the purses.
They are so easy to make and look so elegant when finished.
 
I'm off to do my Black Friday shopping to find some things to fill these up!
 
I used the "bow maker" die from Sizzix - so so so so simple!!!
Just love the polka dot CS and the pretty lime green color. 
The bow and other parts are done with glitter paper from Recollections.


This one has a few different elements.  
Beautiful ribbon from SU
a Darice embossing folder
A pretty SU border punch
Dies from SU
Scor-tape and microfine glitter
and a silver star from an old stash recently found!


Hope you like them.


Wednesday, March 13, 2013

My Favorite Technique Blog Hop


Welcome to Sparkle N Sprinkle's, My Favorite Technique Blog Hop!
If you've hopped over from Karalee's blog, then you're in the right place.
If not, then perhaps you'd like to start at the beginning www.sparklensprinkle.com/blog
 so you don't miss any of the fabulous creations the
 Design Team has come up with.
PLUS - there are prizes hidden along the way.... 
you don't want to miss out on those....  
To ensure that you qualify for those prizes along with
the other prizes available, be sure to leave a comment on each and every blog.


I had such a difficult time selecting a favorite technique, that I'm doing
a combination of several.  I just love coloring with my Copics,  accenting with glitter and using my new favorite Velvet Glitters in various ways (glitter masking, using embossing folders on glittered cardstock and just adding it to my shapes for extra pizzaz).
Then there are all those beautiful Spellbinder Dies....
My favorites list just keeps going on and on and on........you get the picture...

At any rate, here's my card.  It's using Sparkle N Sprinkle's 
After coloring the image with my Copics and die cutting it into an oval, I used Super Adhesive Sheets to create the glittered gold backdrop for the panel.  Check out the Tips & Techniques section called Glitter Masking to see how that's done. Also included in the Glitter Masking is how I made the gold and fuschia scalloped border with the gold glitter panel that's been embossed using a Sizzix embossing folder.  


I just love the new Spellbinder die set called 5 x 7 Elegant Labels 4 - that's what I used for the cream and shimmer green background pieces.  The small floral print panel has distressed edges and it's all topped off with a rose seam binding bow, a few rhinestones, a yellow pearl, and four yellow plastic floral and rhinestone embellies....

Here are a couple of close-ups.


This shows off the Glitter Masking.


 This shows a little of the detail you get when using an embossing folder
after glittering up some cardstock using either the Tear-ific Tape (2 1/2" size) or
the Super Adhesive sheets and covering them with the beautiful Velvet Glitters.
Sparkle N Sprinkle's Ultra-Fine glitter line works equally as well with both techniques.


I really meant to highlight my flower with the Frosted Carmine Velvet Glitter, but picked up the wrong bottle instead - so Goldenrod Velvet  Glitter it is.....


Hope you've enjoyed the hop.....this is the end of the line.
If you see some things you can't live without, here's the link back to 

Don't forget to check back to the Sparkle N Sprinkle Blog over the weekend
to see if you've won a prize....

Just in case you got lost along the way, or want to re-visit another of the 
Designer's blogs, here's the blog hop rotation complete with links.

Marie Berquist  http://www.craftemarie.blogspot.com
Dawn Bennett http://www.dipndotscreations.blogspot.com
Cammy Vietzke  www.stampingtime.blogspot.com
Barbara Bruder  www.artandsoulcreations.blogspot.com
Karin Martin http://www.karin-withaniforpaper.blogspot.com
Jackie Smith  www.stamping4you.blogspot.com
Julie Zippel  http://www.backtobasicsandbeyond.blogspot.com
Shanna Shands  http://www.scsdesigns.blogspot.com
April Williams  www.stampwillydesigns.blogspot.com
Brigita Skopas  http://gitascreations.blogspot.com
Shona Erlenborn  http://www.shonasstampingstage.blogspot.com
Anne Temple  www.annemade-anne.blogspot.com
Karalee Ingram  http://kareescardsandcraftsofcourse.blogspot.com
Brenda Smalle www.rubberroomantics.blogspot.com     YOU ARE HERE

 
Thanks for hopping with us.....


Related Posts Plugin for WordPress, Blogger...
Blogging tips