Wednesday, January 9, 2013

Sparkle N Sprinkle Fancy Folds Blog Hop Coming Soon!


Sparkle N Sprinkle is going in a new direction with their blog hops this year and to start it off, the first hop of the year will feature Fancy Folds!   I'm sure the Design Team is going to wow everyone with their creative cards as they always do and that you'll all join in. 
Yes - there will be prizes... free stamp sets, glitter, embossing powders, etc.  
Join the fun next week Jan 17-20 - lots of time to get those comments in.


Thursday, December 13, 2012

Silver Snowflakes

I haven't had much time to be in my craft room lately, so here's an oldie I dug up using a fun Stampendous snowman and Sparkle N Sprinkle's glitter and Tear-ific Tape.


The image was stamped onto white CS and colored using Prisma Color Pencils and Gamsol.
It's got SNS Sparkling Snow Glitter highlights.  On the right side, I punched out 3 snowflakes.  I attached a strip of 2 1/2" Tear-ific Tape to the back and then covered the negative space with Sassy Silver Glitter from SNS.  To finish off the panel, I used 1/4" Tear-ific Tape to make a frame and covered it also with the Sassy Silver Glitter.   The brads were created from regular silver brads, heated with my heat gun, dipped into SNS Clear Embossing Powder and then immediately into the SNS Sassy Silver Glitter!    I've tried doing brads using Versamark, but the results are as good and it's an unnecessary step.  The Clear EP melts because of the heated brad and the glitter sticks beautifully.


Here's a close-up.


x_3d2a35b6

Saturday, December 8, 2012

Another Beautiful Box

Good thing I have lots of friends to find these fabulous ideas for me!   My friend, Nina did this little box that's perfect for a small gift or candy or cookies or anything else you can think of!


I used more of that fabulous velvety glimmer paper from a Reflections Cardstock Stack.
The rosette was made using the Sizzix Die and I used a small scalloped punch and a crystal clear snowflake for the embellishment.  I made the rosette a little bigger than I had planned, so you really can't see very well the pretty scalloped border under it...


Here's a view from the front.


And a close-up of the rosette.


This one takes one 8 1/2 x 11 sheet of CS too.
Scored at 2"  5"  7"  and 10"  on the long side
Scored at 2" and 7" on the short side.
Trim off all but one of the 2" sections from the top 
(that's your flap)
Cut in to form the box - add tape to the side
then squeeze in little dents on each side and fold the flap over.

It's called the 2-5-7-10 Box and you can google it and get better instructions.

Hugs!


x_3ca76894

Thursday, December 6, 2012

Collapsible Box

How cool is this box!!! My friend, Ann found the pattern for a really easy box that goes together fast and can collapse to store! Perfect size for gift card or small gift. You can get two of them out of one 8 1/2 x 11 sheet of CS.


For decoration, I used a piece of Super Adhesive Sheet from Sparkle N Sprinkle, placed it on white CS, then used a Spellbinder Die to cut it out.  The CS I used was a little too heavy and it didn't cut out all the beautiful little pieces - so I went with it!  It made it all raised up at least - so I covered it with SNS's Cloud Nine Velvet Glitter and then cut a plan one out of white CS to layer on top.  Finished it off with a velvet brad that I had laying around and some skinny ric-rac from May Arts and VOILA!


Here's the box semi-flattened.  
It's only taped together on the sides - the ric-rac holds the bottom and top together!


Here's a close-up.

Want to try it???  Here are the measurements.

For one box:
one 8 1/2 x 5 1/2 piece of CS
Score with the 8 1/2" side on the left at 1" and 4 1/2"
Turn and score at 1"  -  4"  -  5"  and 8"
Clip the two corner sections off the "short" side
Cut down from the 5 1/2" side to the score lines to create your box.
Tape only the side flap.
Use a craft knife and cut a slit a little wider than the ribbon you'll use 
in the center of each of the front and back panels - top and bottom
Thread the ribbon thru and you're done!


x_3ca725f3

Monday, December 3, 2012

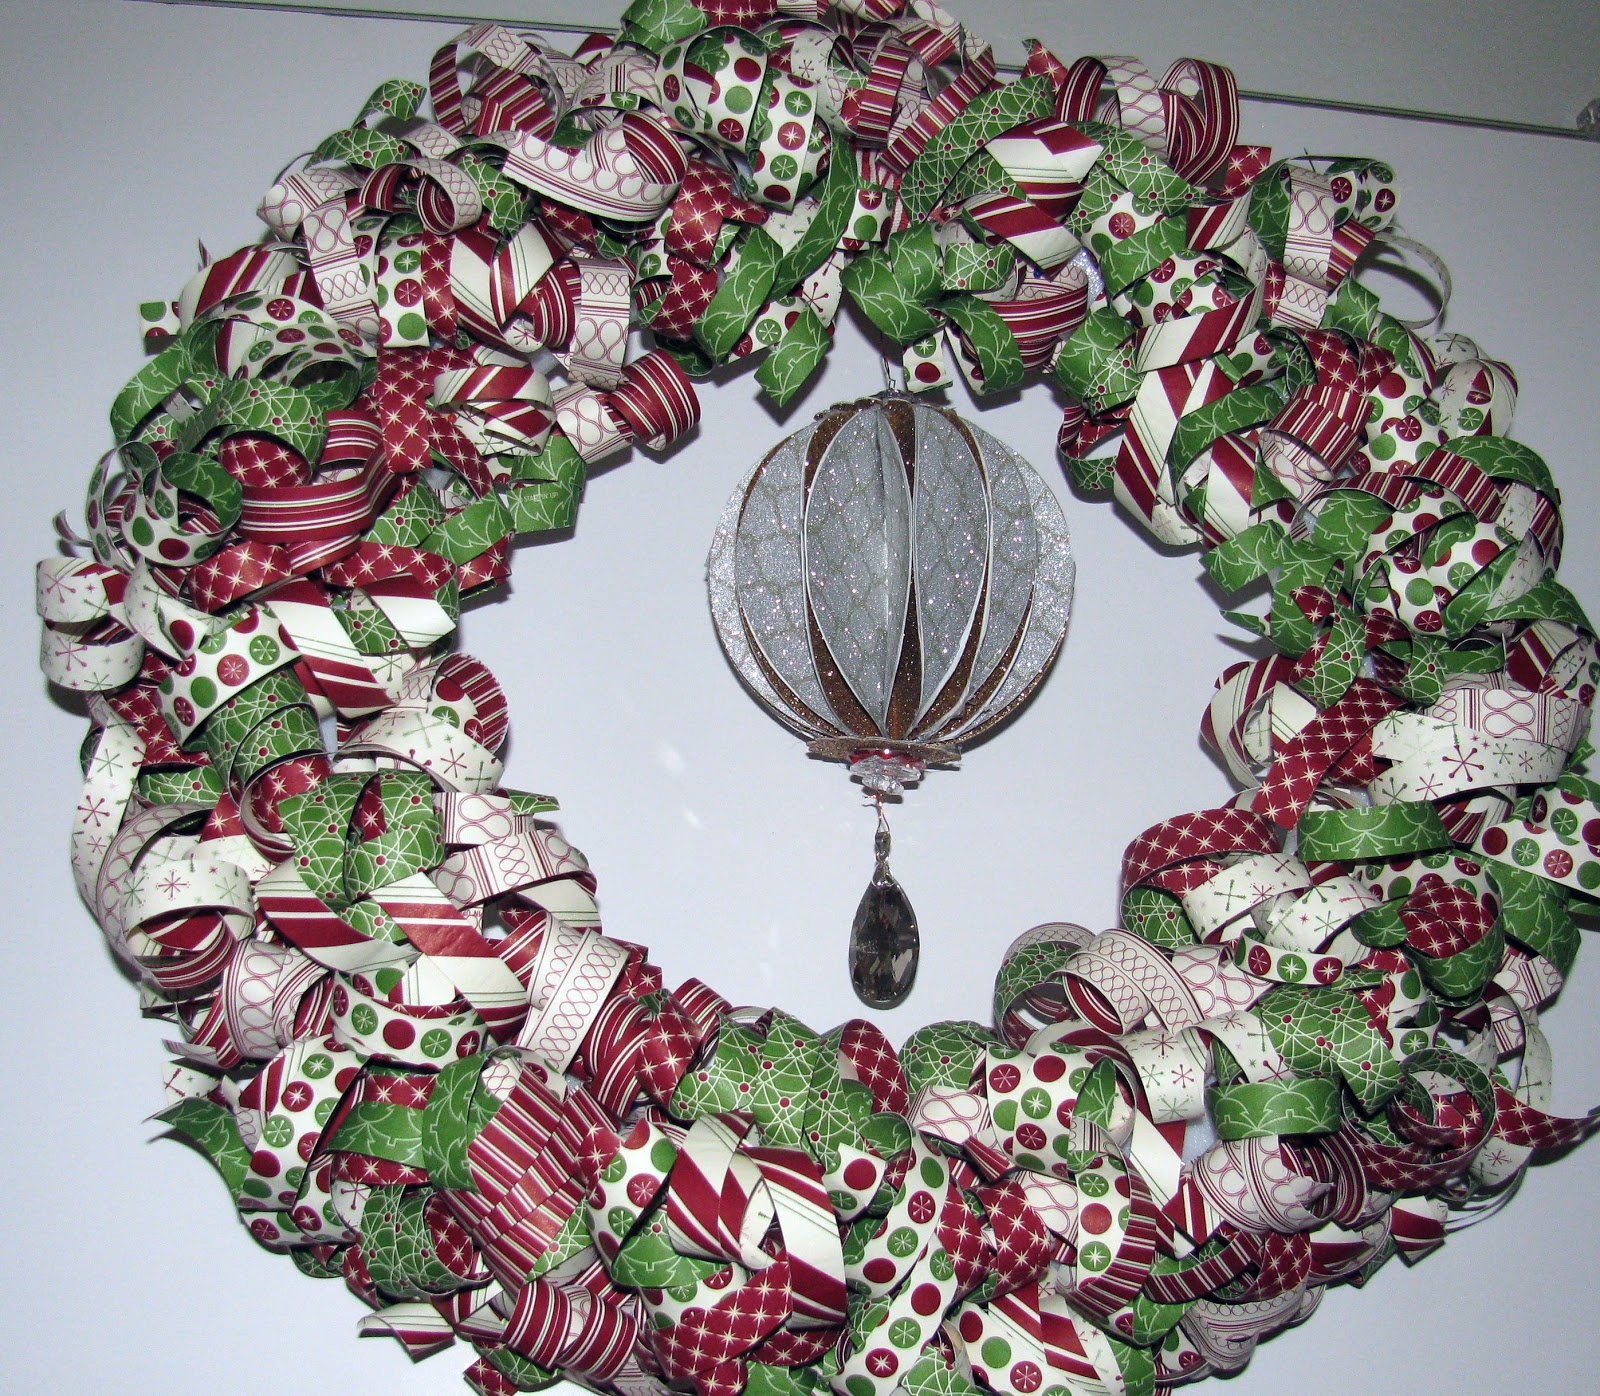
Paper Wreath

My friend, Nancy first did this for Halloween and I loved it - THEN she did Christmas!!!   Keri Brown, one of our Sparkle N Sprinkle Design Team did yet another.....   So...got me in the mood and off I went to do my own.  Turns out to be very simple!  Hardest part, as always is selecting the paper.  I used a set from SU.  It's a little tedious cutting and curling all those strips, but easy and lots of fun when you get going.  Bunches and bunches of 1" x 12" strips.


For the center, I followed my friend, Nancy's Christmas ornament instructions and added it to my wreath.  I used Champagne Glimmer Paper from SU and a patterned velvety paper from Reflections for the ball.  Found a perfect pendant at Michael's in the Champagne Color too.   I'd select a little less heavy CS the next time as the back didn't want to stay together very well.  Oh well, you can't see it anyway LOL...   The ornament was created with 24 circles  (3 1/2") and my trusty hot glue gun.
It's got clear buttons on the top and bottom.


Hope you enjoy it.


x_3d2a35b6

Monday, November 19, 2012

Sparkle N Sprinkle Blog Hop; Winners

BLOG HOP WINNERS!!!

Thanks to all the hoppers who participated in our biggest blog hop ever.
We hope you enjoyed all the creativity as much
as our designers enjoyed creating their beautiful projects.
Below is a list of the winners.

CONGRATULATIONS!
 
   Please e-mail me at  brenda@sparklensprinkle.com
as soon as possible with your full name, address, phone number and prize selections.

GRAND PRIZE #1
Stamp Set of your choice on cling cushion.
TRENA JOHNSON
______________________________


GRAND PRIZE #2
Stampette set of your choice on cling cushion
ROXIE
_____________________________________________

FIRST PLACE
TWO  Velvet Glitters of your choice

CANDY MEYERS


________________________________________________

SECOND PLACE
Choice of three small
embossing powders or regular glitters
 (mix and match)
TERESA GODINES
___________________________________________

THIRD PLACE
Choice of two Glitter TInsels, Flocking or Sparkle N Soft (mix & match)
ROSE WILSON
__________________________________________

BONUS WINNER
Choice of Three Digital Images
CAT

____________________________________________

Once again, thanks for all your delightful comments!  
Our next hop will be in January and the theme
will be a little different this time around.
FUN FOLDS!!!
Sparkle On! and enjoy the upcoming holidays.


Wednesday, November 14, 2012

Sparkle N Sprinkle Winter Wonderland Blog Hop

Welcome to the Sparkle N Sprinkle Winter Wonderland Blog Hop!
It's been a long hop this time, but I hope you've enjoyed the journey
as much as we've enjoyed taking you there.

If you've arrived by way of the Fabulous Jackie Smith's blog, then you're 
in the right place.  If not, you may want to start back at the beginning
so you don't miss any of the fun AND you don't miss any prizes!
Click here to go back to the beginning.   www.sparklensprinkle.com/blog

I'll list the entire rotation below so you can double check and go back
to anyone you may have missed.

My inspiration for Winter Wonderland was actually a stamp image
called Winter Wonderland.  It just seemed appropriate to use that one.
It's a sweet little snowman image that I colored with my Copics and 
glitzed up using the new Sparkle N Sprinkle Velvet Glitters.
If you haven't tried them yet, prepare to be amazed!  They actually 
feel like velvet!!! There are tons of ideas in the Tips & Techniques section
of the Sparkle N Sprinkle website devoted to all the fun ways to use
this fabulous product and I know that some of the other designers
have already shown you some of them.


I've layered the snowman on a few Spellbinder die cuts including one
of my new favorites from the Floral Ovals collection.
The beautiful snowflake background CS is from Recollection
Holiday Glitzy Glitter Collection and feels
 just like the velvet glitters!   The red and cream CS is from
Authentique's Festive Collection and to make it appear to match the 
snowflake background, I covered it with 2 1/2" Tear-ific Tape and covered the 
entire thing with Cloud Nine Velvet Glitter.
Now it's a perfect match.
A little pink pearl flourish bling from EVA Creatives and
ribbon from May Arts and he's good to go.


You can see how well the two cardstocks match even though one was pre-glittered
and the other was glittered by moi :)


The snow under the snowman was created by using Sparkle N Sprinkle

Hope you enjoyed the hop!


x_3d2a35b6

Here's the entire rotation in case there's one (or more) you'd like to return to. 
Remember - to be eligible for any of the prizes you MUST comment on each and
every blog along the way.  We've given you FOUR days to complete this - so you
can comment at your leisure.

Charmagne Welch-Rivera  www.sanurascraps.blogspot.com
Brenda Smalle  www.rubberroomantics.blogspot.com  YOU ARE HERE
Related Posts Plugin for WordPress, Blogger...
Blogging tips