Showing posts with label christmas. Show all posts

Saturday, September 27, 2014

Starting my Christmas Cards...........

Well, it's a start anyway LOL...
Here's my first Christmas card....
very early for me..
 
It's a really cute stamp by Stampendous that
I purchased last year but failed to use :(
 
Colored with Copics and embellished
with microfine glitter.
I've fussy cut the two heads and
popped them up with dimensionals.
 
Hope you like it.
 
 
It's pretty CAS, but easy to mail.
Below is a close-up

 
More to follow................
 
Thanks for checking in


Wednesday, November 27, 2013

Another CAS Christmas card


Here's another sweet Whipper Snapper image -
colored with Copics and highlighted with glitter.
 
The background CS is glittery too.  Popped the image up
using my Spellbinder dies.


Thanks for checkin' in with me.


Monday, November 25, 2013

Keepin' it simple

Starting my Christmas cards a little late, but better than never...
Here's a jolly Santa from Whipper Snapper to start with....
Still keeping it CAS for now... big plans for later.


Colored with copics and highlighted with some microfine glitter....
 
Thanks for joining me.


Saturday, November 23, 2013

I'm not really lost

WOW - just looked at the date on my last post.  I know it's been a while, but didn't think it was that long!!!   I've been busy and my poor craft room has missed me.  I've been to Las Vegas, San Diego, Seattle, Maine & New York and back to San Diego & New York since then along with a Caribbean Cruise a couple of weeks ago.  AND - not done yet - back to NYC for our early Christmas with the kids the beginning of Dec.  YIKES!!!

Anyway - have a few things to post in the CAS mode to get back into the swing.

To start, here are a couple of Christmas ornaments and/or package decorations that I did last week.

 
This one is a take on the 2012 SU Christmas catalog cover... the center is a silk poinsettia.


Here's take 2 - this one was using glimmer cardstock from Recollections and a Prima flower for the center that's sprayed with shimmer mist and the edges are dredged in Sparkling Snow glitter.


These ornaments were made using the Spellbinder's Ornament Dies from a couple of years back - one with regular cardstock and the other with glimmer cardstock... they're fun and easy to make.  The tops are buttons from SU.
 
Hope you enjoyed these.
Back soon - really!!!
 
 
ps...  here's a quick overview of a teeny bit of my summer


NYC - from the cruise ship


Charlie & Sam at the playground


The Mayan ruins at Tulum, Mexico
 
 
7 Mile Beach in Grand Cayman


Mt Rainier, Washington


Scenes from my class reunion in Maine in August..


Cousins & Aunt in Camden, Maine
 
 
Our little gremlins dressed up for Halloween


Coronado with my sister (San Diego)
 
That's a little overview of my summer...


Thursday, December 13, 2012

Silver Snowflakes

I haven't had much time to be in my craft room lately, so here's an oldie I dug up using a fun Stampendous snowman and Sparkle N Sprinkle's glitter and Tear-ific Tape.


The image was stamped onto white CS and colored using Prisma Color Pencils and Gamsol.
It's got SNS Sparkling Snow Glitter highlights.  On the right side, I punched out 3 snowflakes.  I attached a strip of 2 1/2" Tear-ific Tape to the back and then covered the negative space with Sassy Silver Glitter from SNS.  To finish off the panel, I used 1/4" Tear-ific Tape to make a frame and covered it also with the Sassy Silver Glitter.   The brads were created from regular silver brads, heated with my heat gun, dipped into SNS Clear Embossing Powder and then immediately into the SNS Sassy Silver Glitter!    I've tried doing brads using Versamark, but the results are as good and it's an unnecessary step.  The Clear EP melts because of the heated brad and the glitter sticks beautifully.


Here's a close-up.


x_3d2a35b6

Monday, December 3, 2012

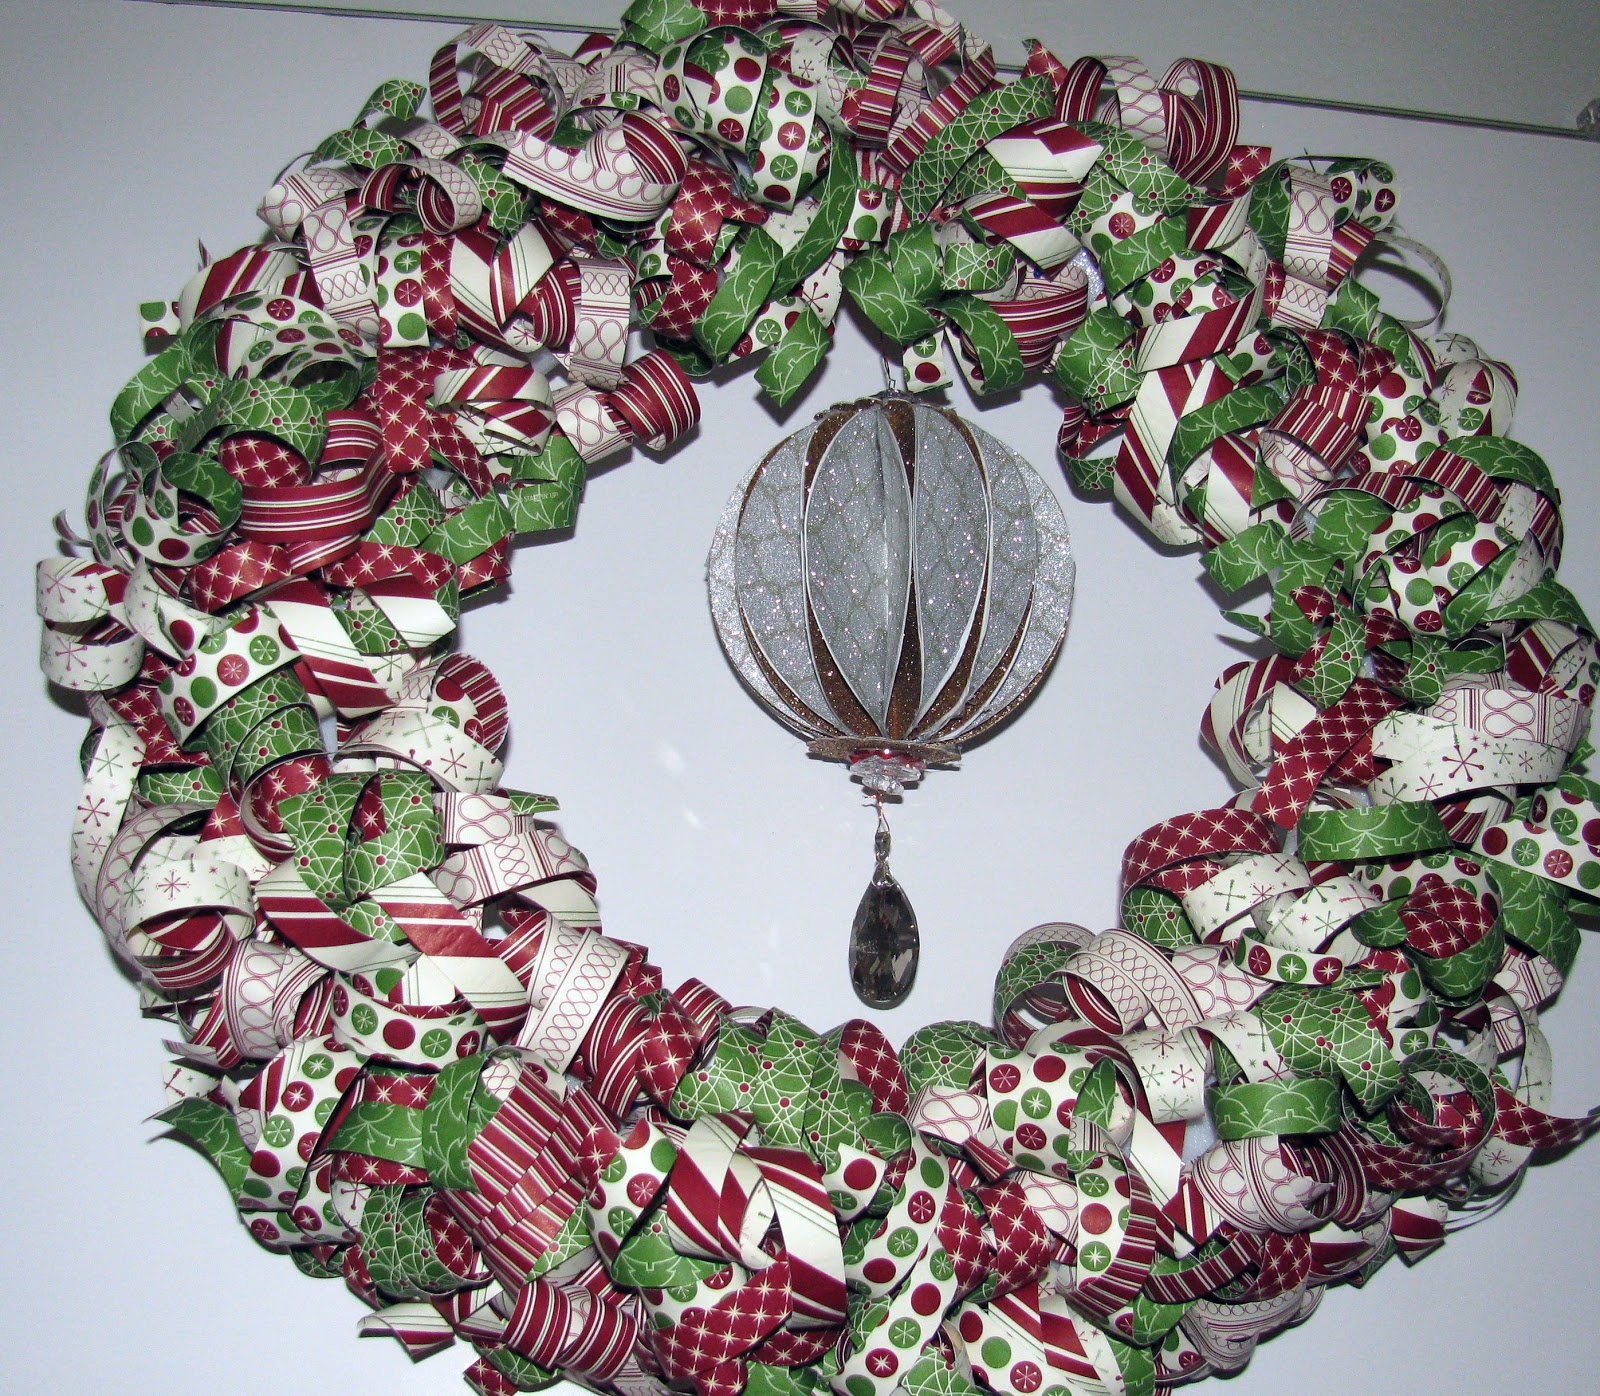
Paper Wreath

My friend, Nancy first did this for Halloween and I loved it - THEN she did Christmas!!!   Keri Brown, one of our Sparkle N Sprinkle Design Team did yet another.....   So...got me in the mood and off I went to do my own.  Turns out to be very simple!  Hardest part, as always is selecting the paper.  I used a set from SU.  It's a little tedious cutting and curling all those strips, but easy and lots of fun when you get going.  Bunches and bunches of 1" x 12" strips.


For the center, I followed my friend, Nancy's Christmas ornament instructions and added it to my wreath.  I used Champagne Glimmer Paper from SU and a patterned velvety paper from Reflections for the ball.  Found a perfect pendant at Michael's in the Champagne Color too.   I'd select a little less heavy CS the next time as the back didn't want to stay together very well.  Oh well, you can't see it anyway LOL...   The ornament was created with 24 circles  (3 1/2") and my trusty hot glue gun.
It's got clear buttons on the top and bottom.


Hope you enjoy it.


x_3d2a35b6
Related Posts Plugin for WordPress, Blogger...
Blogging tips