Showing posts with label super adhesive sheets. Show all posts

Wednesday, March 13, 2013

My Favorite Technique Blog Hop


Welcome to Sparkle N Sprinkle's, My Favorite Technique Blog Hop!
If you've hopped over from Karalee's blog, then you're in the right place.
If not, then perhaps you'd like to start at the beginning www.sparklensprinkle.com/blog
 so you don't miss any of the fabulous creations the
 Design Team has come up with.
PLUS - there are prizes hidden along the way.... 
you don't want to miss out on those....  
To ensure that you qualify for those prizes along with
the other prizes available, be sure to leave a comment on each and every blog.


I had such a difficult time selecting a favorite technique, that I'm doing
a combination of several.  I just love coloring with my Copics,  accenting with glitter and using my new favorite Velvet Glitters in various ways (glitter masking, using embossing folders on glittered cardstock and just adding it to my shapes for extra pizzaz).
Then there are all those beautiful Spellbinder Dies....
My favorites list just keeps going on and on and on........you get the picture...

At any rate, here's my card.  It's using Sparkle N Sprinkle's 
After coloring the image with my Copics and die cutting it into an oval, I used Super Adhesive Sheets to create the glittered gold backdrop for the panel.  Check out the Tips & Techniques section called Glitter Masking to see how that's done. Also included in the Glitter Masking is how I made the gold and fuschia scalloped border with the gold glitter panel that's been embossed using a Sizzix embossing folder.  


I just love the new Spellbinder die set called 5 x 7 Elegant Labels 4 - that's what I used for the cream and shimmer green background pieces.  The small floral print panel has distressed edges and it's all topped off with a rose seam binding bow, a few rhinestones, a yellow pearl, and four yellow plastic floral and rhinestone embellies....

Here are a couple of close-ups.


This shows off the Glitter Masking.


 This shows a little of the detail you get when using an embossing folder
after glittering up some cardstock using either the Tear-ific Tape (2 1/2" size) or
the Super Adhesive sheets and covering them with the beautiful Velvet Glitters.
Sparkle N Sprinkle's Ultra-Fine glitter line works equally as well with both techniques.


I really meant to highlight my flower with the Frosted Carmine Velvet Glitter, but picked up the wrong bottle instead - so Goldenrod Velvet  Glitter it is.....


Hope you've enjoyed the hop.....this is the end of the line.
If you see some things you can't live without, here's the link back to 

Don't forget to check back to the Sparkle N Sprinkle Blog over the weekend
to see if you've won a prize....

Just in case you got lost along the way, or want to re-visit another of the 
Designer's blogs, here's the blog hop rotation complete with links.

Marie Berquist  http://www.craftemarie.blogspot.com
Dawn Bennett http://www.dipndotscreations.blogspot.com
Cammy Vietzke  www.stampingtime.blogspot.com
Barbara Bruder  www.artandsoulcreations.blogspot.com
Karin Martin http://www.karin-withaniforpaper.blogspot.com
Jackie Smith  www.stamping4you.blogspot.com
Julie Zippel  http://www.backtobasicsandbeyond.blogspot.com
Shanna Shands  http://www.scsdesigns.blogspot.com
April Williams  www.stampwillydesigns.blogspot.com
Brigita Skopas  http://gitascreations.blogspot.com
Shona Erlenborn  http://www.shonasstampingstage.blogspot.com
Anne Temple  www.annemade-anne.blogspot.com
Karalee Ingram  http://kareescardsandcraftsofcourse.blogspot.com
Brenda Smalle www.rubberroomantics.blogspot.com     YOU ARE HERE

 
Thanks for hopping with us.....


Thursday, December 6, 2012

Collapsible Box

How cool is this box!!! My friend, Ann found the pattern for a really easy box that goes together fast and can collapse to store! Perfect size for gift card or small gift. You can get two of them out of one 8 1/2 x 11 sheet of CS.


For decoration, I used a piece of Super Adhesive Sheet from Sparkle N Sprinkle, placed it on white CS, then used a Spellbinder Die to cut it out.  The CS I used was a little too heavy and it didn't cut out all the beautiful little pieces - so I went with it!  It made it all raised up at least - so I covered it with SNS's Cloud Nine Velvet Glitter and then cut a plan one out of white CS to layer on top.  Finished it off with a velvet brad that I had laying around and some skinny ric-rac from May Arts and VOILA!


Here's the box semi-flattened.  
It's only taped together on the sides - the ric-rac holds the bottom and top together!


Here's a close-up.

Want to try it???  Here are the measurements.

For one box:
one 8 1/2 x 5 1/2 piece of CS
Score with the 8 1/2" side on the left at 1" and 4 1/2"
Turn and score at 1"  -  4"  -  5"  and 8"
Clip the two corner sections off the "short" side
Cut down from the 5 1/2" side to the score lines to create your box.
Tape only the side flap.
Use a craft knife and cut a slit a little wider than the ribbon you'll use 
in the center of each of the front and back panels - top and bottom
Thread the ribbon thru and you're done!


x_3ca725f3

Saturday, November 10, 2012

Snowmen have more fun

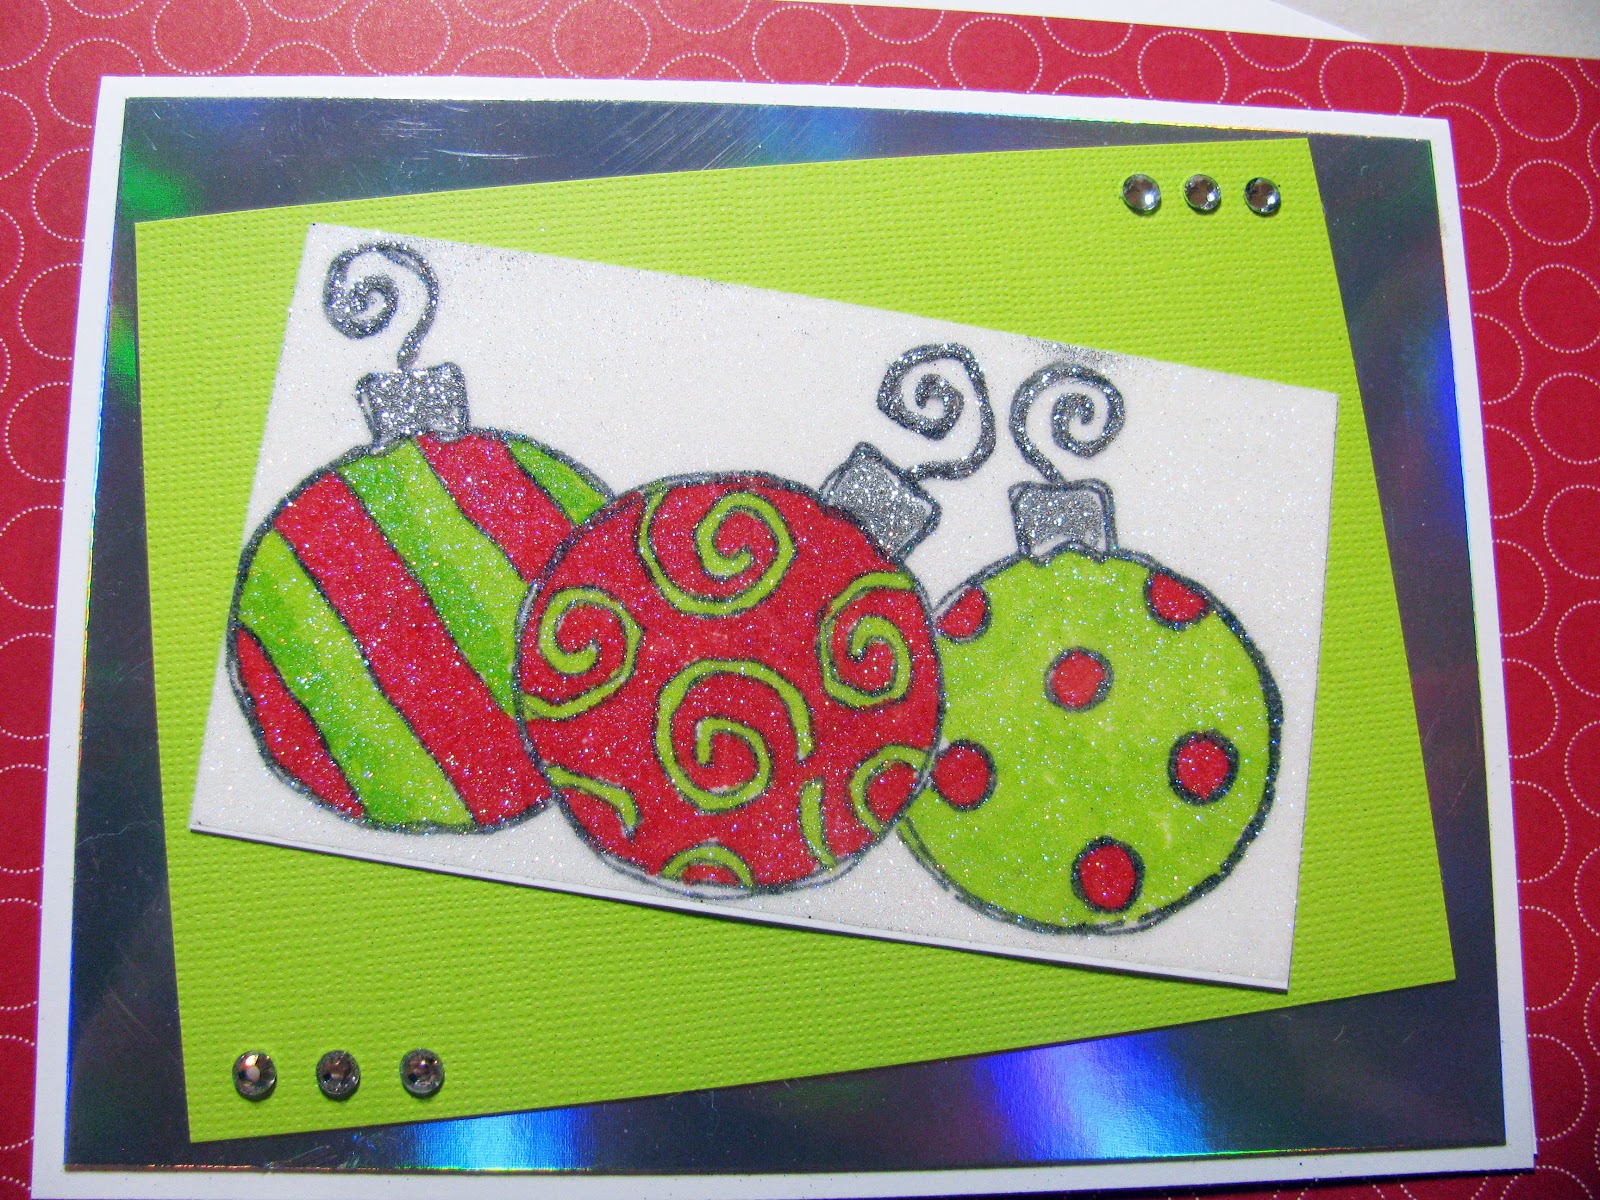
And the roll continues :)    Here's a cute little Snowman image from Penny Black that's one of my all time favorites.  I used some of Sparkle N Sprinkle's Super Adhesive Sheets - peeled off the protective backing from one side - layered it onto a piece of cardstock - die cut my circle - covered it with Cloud Nine Velvet Glitter from SNS - stamped the image with Memento ink and colored it with Copics.  LOVE LOVE LOVE the look.  The Copics are sheer so the glitter just shines thru the coloring.


Here's another card done using the same technique.  This stamp image is from Print Works.
On this image, after I colored it, I added some SNS Dimensional Glue to the hooks and the toppers and covered it with Reflections Velvet Glitter.


Wednesday, September 19, 2012

GHOSTS & GOBLINS FALL FROLIC BLOG HOP

Welcome to the Sparkle N Sprinkle
Ghosts & Goblins Fall Frolic
Blog Hop!!!

If you arrived here by way of Karalee Ingram's inspiring blog, 
you're in the right place!!!
If not, you may want to start back at the beginning so that you 
don't miss anything.   wwww.sparklensprinkle.com/blog

Did I mention prizes???   Five Fabulous Prizes will be awarded.
To win one, all you have to do is leave a comment on each and 
every blog during the hop.  Three of those prizes are on an
individual blog - so miss that and miss out on a prize opportunity.

One of the things I miss living in Arizona are the beautiful fall 
colors of the east coast.  I grew up in Maine and lived in New York
for many years and saw so much fabulous fall foliage.  Florida had a bit as
does Arizona, but I travel back from time to time to get my "fall fix".
Halloween has always been one of my favorite holidays too.
I love seeing all the children dress up in their costumes.

At any rate, I decided that I would do a Halloween card for my post.
I admit that I got a little carried away by my project this time, so there's only one.
I started with a normal card and the mojo just wasn't there.
Then I decided on an easel card,but decided that I had done that already
for a previous hop.  What's a girl to do!
I really liked my easel card idea - I saw a card that someone had done recently
(don't ask me where I saw it LOL) combining an easel card and a gate fold card.
GENIOUS!!!
So, without further ado, here's my take on the easel  card/gate fold combo
with many thanks to whomever it was that I got the idea from.


Here's the front of the card with it's "belly band" keeping it closed.  
The cardstock was from the Recollections Midnight Magic Pack.
To create the (if I must say so myself LOL) gorgeous glittered band on the front,
I used a piece of black cardstock, ran a strip of Tear-ific 2 1/2" Tape down the center and then a strip of Tear-ific 1/4"Tape down each side of it.  I masked the center piece with a border punched out of the protective backing from my Super Adhesive Sheet  (used on the inside) see the
 Glitter Masking Technique on the Sparkle N Sprinkle website to see how to mask
and three of the fabulous new micro-fine glitters fromSparkle N Sprinkle.  They're like velvet!!!
The belly band was just a strip of cardstock, embellished with a soft wide grosgrain ribbon attached with a black and rhinestone buckle
 with a black pearl on top.


Here's a close-up of the glitters!  Don't they just make you drool???
AND - when they're rubbed into the tape - they don't come off!!!!!!!!!!!!!!!!!!


Open up the "gates" and inside you'll find Spooky Sally from  Stamp Set 470 - Candy Corn Halloween..  This is where I used the Super Adhesive Sheets.   See  the Stamping on Glitter (or flocking) Technique on the Sparkle N Sprinkle website.  I cut out a circle die cut using the Super Adhesive Sheets layered onto cardstock - covered it with Cloud Nine micro-fine glitter, then stamped the image with black Staz-on ink.  The image was then colored using my Copic Markers.

So - that was cute, but not enough!!!

Spooky Sally is actually on an easel card that opens up!
Got my greeting and
a space to write a little something
and NOW it's done.


Here's a little close-up of the greeting and those little spider stickers I found.


Here's a close-up of Spooky Sally stamped onto glitter.

Hope you had a ghoulish time checking out these techniques
 and my combo  card.

Enjoy the rest of the hop!!!

Next on your journey is  Shona Erlenborn who always comes up with 
something fabulous for you!


x_3cded0f6">

Wednesday, August 1, 2012

Our Furry Friends - Blog Hop - Aug 2-3

It's time for another Sparkle N Sprinkle blog hop!  
This month it's Our Furry Friends. 
 Join us for our vision for our pets, our favorite wild animals or even insects!   


Instead of always being at the tail end of the hop, this month I'll be first to kick off the hop!  I'm excited to show you two very different projects - both using the same stamp set.
Before I get started on the fun stuff -
 let's get all the other stuff out of the way LOL.
Don't forget to comment on each and every blog to be eligible for 5 fabulous prizes!   Three of the prizes are "hidden" on separate designers blogs and if you don't comment - you may miss out.
If you get lost along the way, or if a pesky "glitch" happens -
 just check back at the SNS Blog to find your way.

For my first project, I decided to do some "altered art".  You may remember that SNS used to do a lot of acrylic art.  Well - thanks to Jill - we've dusted off our acrylics and embarked on a new fun use for them.  I've started with 4 acrylic tags and 1 square 3 x 3 piece to create this fun votive using Stamp Set 466 - Wild Cats by artist, Rosiland Solomon.


Here it is in daylight and below when it's darker. 
 I used a battery operated votive candle.


To create the votive, I used a sanding block on both sides of each of the acrylic tags to make them look "frosted"  then "dusted" them with my Static Free (anti-static) bag.   Next stamp the image with Versamark (I used the snow leopard) and emboss with Tuscan Sun and Tuscan Star embossing powders (2 each).  When they cool off,  just dust off any remaining powder.
The panels are glued together using fast dry Krazy Glue and then Krazy Glued to the square acrylic piece to create the bottom of the votive.

Here are a couple of close-ups of the cats.


Another cool way to use the acrylic pieces with the embossing actually makes them appear like etched glass!  Just stamp with Versamark and emboss using Detail Clear embossing powder.  
Simply Awesome!!!

Here's a sample using the same image.


 For my next project, I went the traditional way, but used the Tiger.
The first time that I ever went to a "real" zoo was in Washington, DC back in the early 70s and my very favorite animals were the fabulous white bengal tigers.  They've remained my favorites ever since.  I really enjoyed seeing them at the Mirage in Las Vegas when Sigfried & Roy had their tiger act.  Unfortunately, I didn't ever get to the show itself!  One of those things that you always thought - next time and then it was too late.

 I used the Super Adhesive Sheets on this one.  After peeling off the protective backing from one side (which I save to make masks out of with my border punches, etc. for other projects - like my Christmas Ornaments from a previous post) I attached the sheet to a piece of white cardstock.  I then used my Spellbinder Big Scallop Circles die to cut out my basic shape.  I peeled off the remaining protective covering and covered the sticky part with Snow White flocking.  The image was then stamped directly onto the flocking with black Staz-on ink.  I highlighted the nose and ears with a Tombow marker and then assembled the rest of the card.  


Here's a close-up of the tiger.


I hope you enjoyed MY furry friends :)

Next up on the hop is the very creative Marie Berquist. 
 Marie always comes up with a jaw dropping experience for you and this one will be no different!

Here's the line-up for the hop:

Brenda Smalle (that's me)

Enjoy the hop!!!


x_3bfafdc0

Wednesday, July 11, 2012

Sparkle N Sprinkle Christmas in July Blog Hop

It's Christmas in July!!!  
Time to start thinking about all those fab Christmas projects you're going to do this year. I always put it off way to long and never get everything done that I plan on doing. This year will probably be no exception. LOL We're hoping that this hop will help everyone get their Christmas mojo started! 

If you hopped here by way of the super fabulous, Gerlinde Townsley - then you're in the right place!
Otherwise, you may want to start at the beginning so you don't miss a thing.  Since there are five awesome prizes - you don't want that to happen :)   Three of the prizes are "hidden" on 3 of the designers blogs - SO - if you miss one - you miss a chance at a prize.

You MUST leave a comment on each and every blog to be eligible for prizes. 
 BUT - you don't have to leave them all at once - it's a two day hop - just make sure you get a comment on each blog by the end of the second day....

By now you've probably already gotten the word that we have a brand new designer at Sparkle N Sprinkle.  Michelle Perkett brings us some really beautiful designs and they'll be available in digital image form along with a selection done in "conventional" rubber stamps.
Woofie's Christmas - Set 468S is a stampette set with one of those designs.  He's an adorable little puppy playing in the snow and I thought that would be a fun way to start.


I stamped him with Memento Tuxedo Black ink and colored him with my Copics.  A little Sparkle N Soft Twinkling Clouds flocking and some Sparkling Snow glitter added my "bling".
The white background panel was done using the Stampin' Up Northern Flurry embossing folder.
Spellbinder Oval and Scalloped Oval Dies and two sizes of oval punches rounded (or ovaled) out the rest.  The beautiful green velvet skinny ribbon was from May Arts.
 Here's a close-up of the "bling"


For my second project, I decided on total bling!   I started with a Super Adhesive Sheet.  Removed the top protective layer (save this) and placed it sticky side down onto cardstock for stability.  I then used the Spellbinder Heirloom 2010 Dies and die cut my ornament.  Using the "saved" protective layer from the first step - punch and/or die cut out embellishments and use those for masks.  NOTE:  You can also die cut other intricate shapes - instead of the ornaments and use the second protective layer after removing it for a mask too.  
Peel the protective backing off the ornament - lay on the masks that you'd like to use (make sure to put the slick side down so you can remove it again).  Glitter with your main color - being sure to rub in the glitter well and brush off the excess.  With tweezers, remove the first mask - rub in your next glitter color and brush off the excess.  Continue this until you have removed all the masks.  Add some rhinestones and ribbon and VOILA!!!
Easy Peasy!!!
These can be used for gift bag decorations, gift tags, ornaments - or on your cards or scrapbook pages.  The sky's the limit!


Here are close views of the individual ornaments.  I used the two larger sizes of dies and a selection of the fabulous Sparkle N Sprinkle Glitters.


Hope these will inspire you!

If you've hopped with us before, then you know that I'm the end of the line always....   If you've missed any - just go back to the Sparkle N Sprinkle Blog.    If you've seen something that grabs your fancy, here's the link to the shopping section of the website. 
Check out the digital image section to see Michelle Perkett's line and the New Product section to quickly see the Michelle Perkett stamp sets along with several other new stamp sets that debut today.

All the Christmas & Winter, Jewish & Christian stamps are 15% off this month along with a selection of Glitter, Glitter Tinsel, Embossing Powders & Flocking.

Thanks so much for joining the hop!


x_3ca76894">

Wednesday, May 16, 2012

Sparkle N Sprinkle Celebrating Summer Blog Hop

WELCOME!!!
It's the Sparkle N Sprinkle Celebrating Summer Blog Hop!

If you hopped here by way of Karin Martin's super, fabulous blog,  then you are in the right place!  Otherwise, you might like to start from the beginning at www.sparklensprinkle.com/blog to become eligible for 5 fabulous prizes.   To be eligible for the prizes, all you have to do is leave a comment on each designer's blog.  You MUST leave a comment on each blog to be eligible though.   Three of the prizes are given by individual designers and no one knows who they are so it's important to comment on them all!
Here's a complete list just in case you got lost along the way.

www.sparklensprinkle.com/blog
April Williams   http://stampwillydesigns.blogspot.com
Marie Berquist  http://craftemarie.blogspot.com
Shona Erlenborn   http://shonasstampingstage.blogspot.com
Julie Zippel  http://backtobasicsandbeyond.blogspot.com
Shanna Shands   http://scsdesigns.blogspot.com
Barbara Bruder  http://www.artandsoulcreations.blogspot.com
Angie Blasingame    http://hopemorestudio.blogspot.com
Karalee Ingram  http://kareescardsandcraftsofcourse.blogspot.com
Jill Jacobsen   http://www.stampinhands.com
Gerlinde Townsley   http://mycreativecorner-gerlinde.blogspot.com
Charlene Driggs   http://www.paperandinkplayground.com
Karin Martin   http://karin-withaniforpaper.blogspot.com
Brenda Smalle   http://www.rubberroomantics.blogspot.com  (that's me!!!)

Yep - as always, I'm the end of the line..

I always think of summer as water - could be a lake, could be a pool, could be a river, could be a stream or could be the ocean - but always water.   I grew up in Maine - so it was the lake - lived in NYC for many years - so it was Rockaway Beach or the Hamptons - in Texas - it was the pool and then Florida - beaches, beaches, beaches and my backyard pool!   Now in sunny Arizona, it's the Salt River for tubing or the pool...  missing the ocean a little :(  BUT - it's not a far drive to visit.
Swimming, tubing or just lounging on the beach or by the pool (did I mention that I'm the lazy river kind of gal LOL).  Plop me on a float and I'm good to go.
My first card is an oldie....   just a CAS card from way back... it features one of the stars of Stamp Set 360 - Pigs on Parade... add some CS using an embossing folder and a little bling in the way of some of  SNS fabulous glitters - an adorable sunglass brad and done.  It was one of my first endeavors using my Copic Markers.  I think I've improved bunches since then :)


Card number two is a tropical beach scene as the sun is going down with all of that sparkle bouncing off the beach and the water.  Reminds me of my years living in Florida and of many trips to to the Caribbean - lots of sand - lots of water (there's that water again) and the palm trees.
Couldn't make a decision on this one - so here it is with two different background colors - I like them both - so instead of making a decision - I'm showing them both.


I started with a piece of Super Adhesive Sheet attached to white cardstock - after running it thru my Grand Caliber using the Grand Labels 11 die, I simply tore one section of the top protective covering at a time - adding my glitter layers as I went along.  There's glitter "under" the beach too, but I added a little Tahiti Beach Mudd Puddles for texture and a few little shells from  Mudd Puddles Sea Life.  The images were all colored using Copics, fussy cut and attached while the Mudd Puddles was still wet and using dimensionals on the top to raise them up.  A slightly messy project, but lots of fun and much blingier in person.


I decided before I added the Mudd Puddles to the beach, that I wanted a little more texture - so dug out my new Spellbinders Embossability folder - Sea Beauty.

Last, but not least - here's what you need for it all.  This is a small card I made from a template that was to have been a corset, but just screamed swimsuit to me.  I found this old Stampin' Up designer paper that worked perfectly for it.  No stamping involved - only pearls and glitter (Sea Shell and Bubble Gum) added to embellish the design on the paper.  Quick, easy and fun!  
This card opens from the top.  


Hope you liked my summer fun...the design team has really outdone themselves once again!  

Don't forget - you MUST leave a comment on each and every blog to be eligible to win one of the FIVE fabulous prizes....   THREE of them are on individual blogs and no one knows which blogs they are!   Don't miss out and check back on the SNS Blog on Saturday for a list of the winners.

See some things you just need to have right now???   Here's a link back to the SNS store.
Thanks for hopping with us!


x_3c0269f7

Thursday, April 12, 2012

REALLY!!!

This is excitement at it's best!   Charlie just loves life....   This was a pretty simple layout and the bling was all added using Tear-ific Tape for the stripes on the side and Super Adhesive Sheets punched into circles and letters from an alphabet template.   I used Orange Surprise & Navy glitters from Sparkle N Sprinkle and also Yellow Gold glitter tinsel.  Added a few buttons and Voila!!!  Can you tell he's a Syracuse fan....   Mom & Dad are both alumni.


x_3bfa0be9
Related Posts Plugin for WordPress, Blogger...
Blogging tips