Showing posts with label memento ink. Show all posts

Friday, February 7, 2014

Boxes in the Round Finished

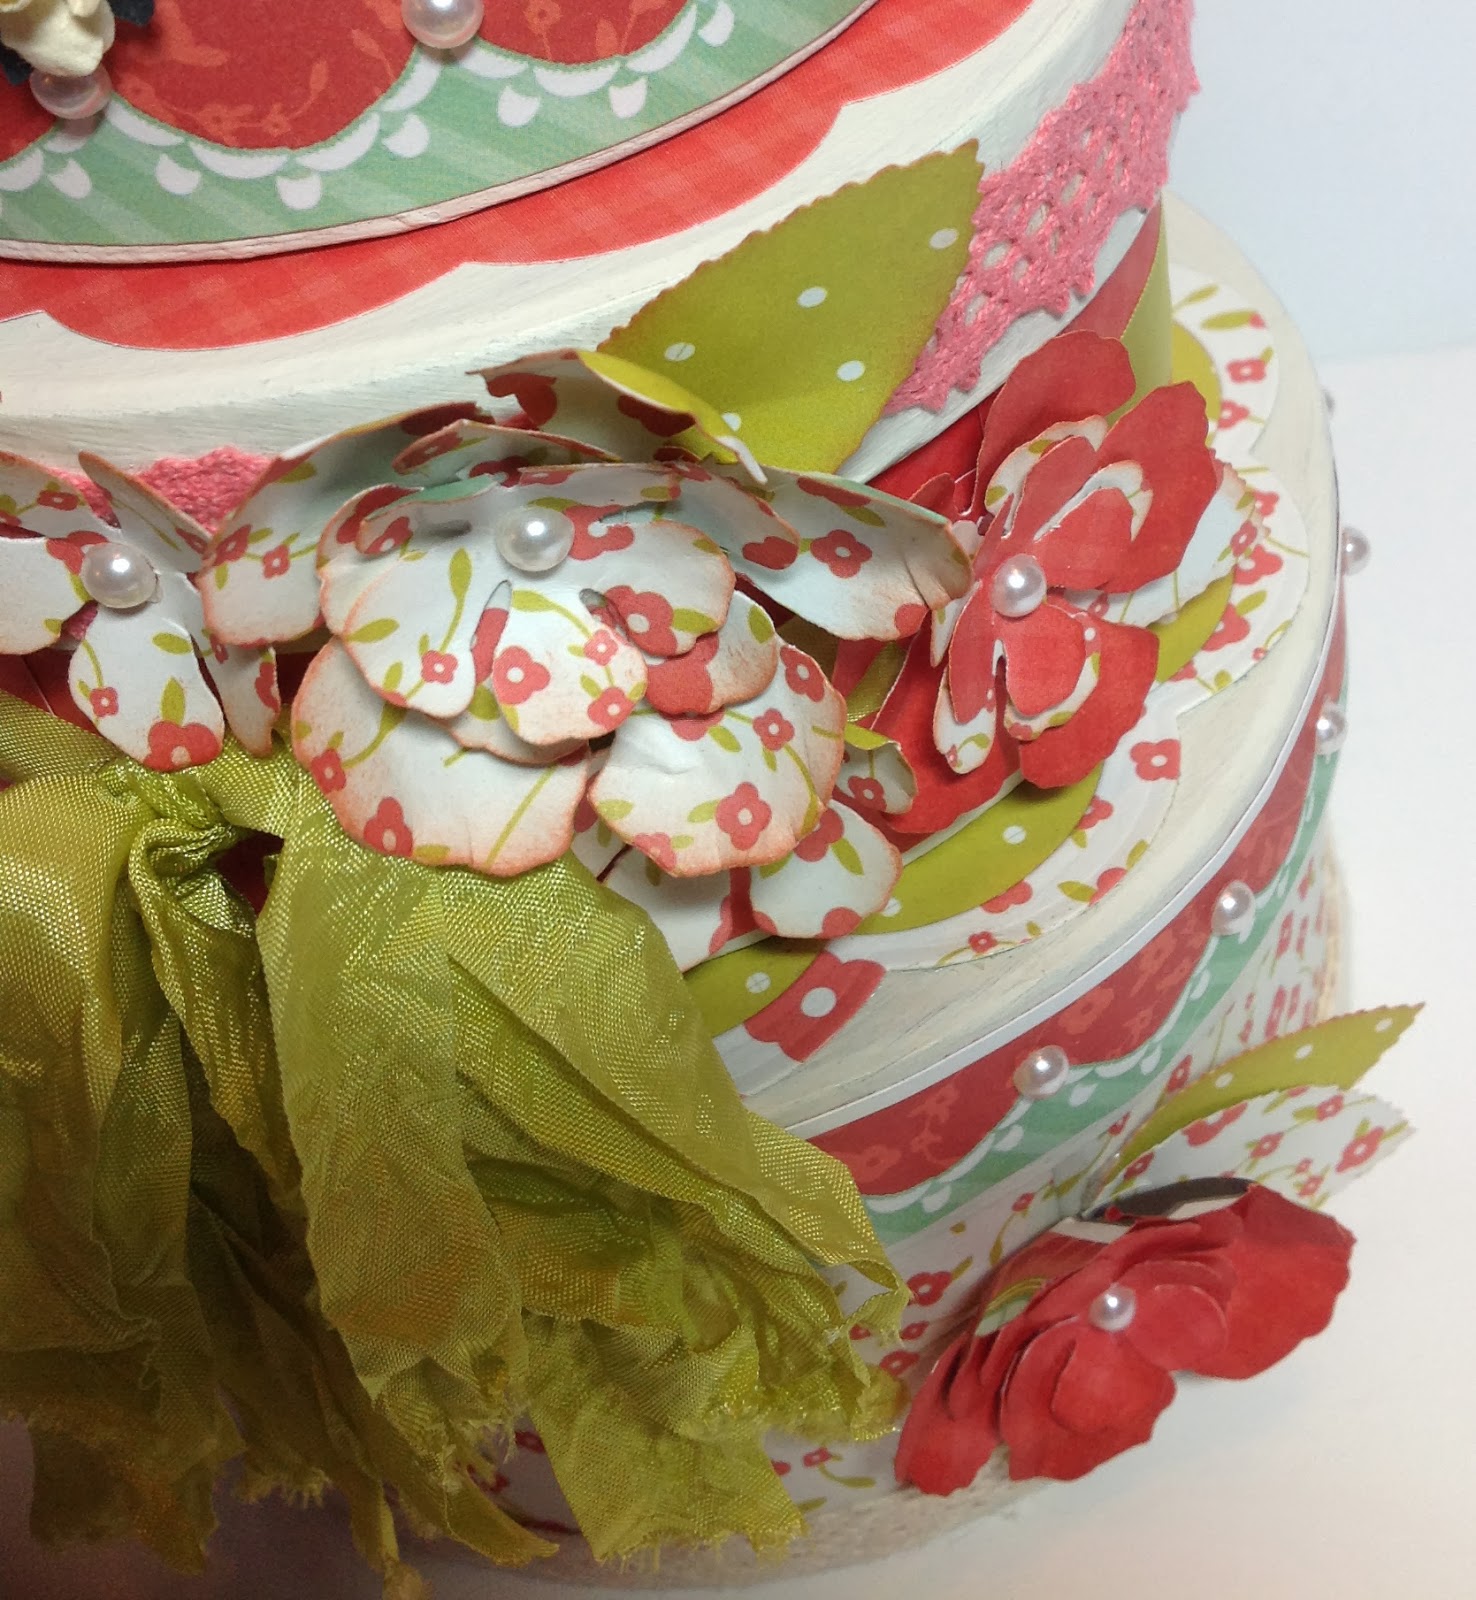
Finally finished decorating my
boxes in the round.
My husband says it looks like
a birthday cake.....


Here are two views....
With the exception of the
tiny cream flowers, the others
were all made with either the
Spellbinders Rose Creations dies
or a Cricut image.
I sponged them with Memento Potter's Clay ink
and added SU Pearls.
Found some seam binding in my stash
to add and the laces are from May Arts.
 
Here are a couple of close-ups.


The boxes were a lot of fun to decorate.
Hope you enjoyed them.
 
Brenda


Tuesday, January 21, 2014

Pink & Brown

I saw this cute box idea on a blog
I follow and went to SplitcoastStampers.com
and got the tutorial, but can't for the life
of me remember who I got the idea from :(
If it was YOU - thanks bunches!!!
It's another easy-peasy fun to do project.
 
Again, I made it simple as it will
just be my "prototype" for a
possible future class project.
I plan to do more boxes and those
I will make a little more elaborate.
 
I always try to make something a little
more "plain" the first time out
of the box (no pun intended LOL)
so that I have it for a sample to work from.
 
Here's my prototype.
 
 
The box was created using pink and brown CS from SU.
I attached the pink and brown decorative panel
together and then used a Sizzix (SU) embossing folder
to give it texture.
The greeting is also from SU from the Oval All Stamp Set
and punched with the SU Label punch.
The brown velvet brad was from Creative Imaginations.

 
Here's a close-up of the embellies.

 
The inside of the box has space for candy!  Yippee...
The tutorial shows 5 Hersey Kisses,
but, unfortunately, I ate them all before I made the box.
The greetings are more SU images
and as you can see, there's a slot for a gift card.
The decorative "slot" w as using the
SU Labels punch.
I also opted to use a corner rounder on the pizza box
type cover and used a Velcro dot to hold the
box together.  You can see that it "pouches the box out"
and for future boxes, I would use a ribbon tied around
the box as a closure instead.
I'd also go a little fancier with my inside too
depending on what the occasion was.
 
Hope you enjoyed my "prototype" for this fun project.


x_3c440cb0 photo x_3c440cb0.gif

Sunday, January 19, 2014

Pop-Up Flamingo

Trying to keep the momentum going
this year on my blog......
My friend, Ann is doing this
pop-up box as a club project
so have decided to try one out.
Easy-peasy!!!
You can find the tutorial on
It's called the pop-up card box
and is super easy to make.
 
 
As it was a club project,
I kept it a little more simple.
Hope you like it.
 
 
I used dark brown CS from SU
for my base and DP from
The Paper Studio's - Beach House Collection.
The 2 palm trees are a stamped
image from Stamps In Motion (1996)
and the flamingo scene is a stamp
image from Viva Las Vegas Stamps.
The greeting is from SU - After Thoughts Set


Here's a close-up of the inside of the box.
Images were colored with Copics.
Had to lighten it up a bit so you could see
so the DP doesn't really appear to be the same :(

 
The beauty of this little box is that
it folds FLAT!!!

 
The back of the box has an additional
CS piece attached so that it doesn't
flop around and is meant for a place
to add your greeting.
I opted to make a little pocket
behind the flamingo image on
the front side of the back panel
for a place to insert a gift card.
I decorated the back with the same DP instead.
You can see by the below image where
I've inserted a "fake" gift card.

 
Hope you've enjoyed this project
and will try it out.
It's so clever and easy.
Thanks to the creator!


x_3c0269f7 photo x_3c0269f7.gif

Friday, January 3, 2014

Off to the Beach

Here's a second album that my sister, Lynn and I did while she was visiting.
It's an album that we've both done before, but wanted to revisit.
It's called back to back bookbinding and I did one last year
with a European vacation theme that you can find
in a previous posting.
 
This one has a beachy theme.
I used basic kraft CS for my unifying theme and
the papers were from The Paper Studios Beach House collection.


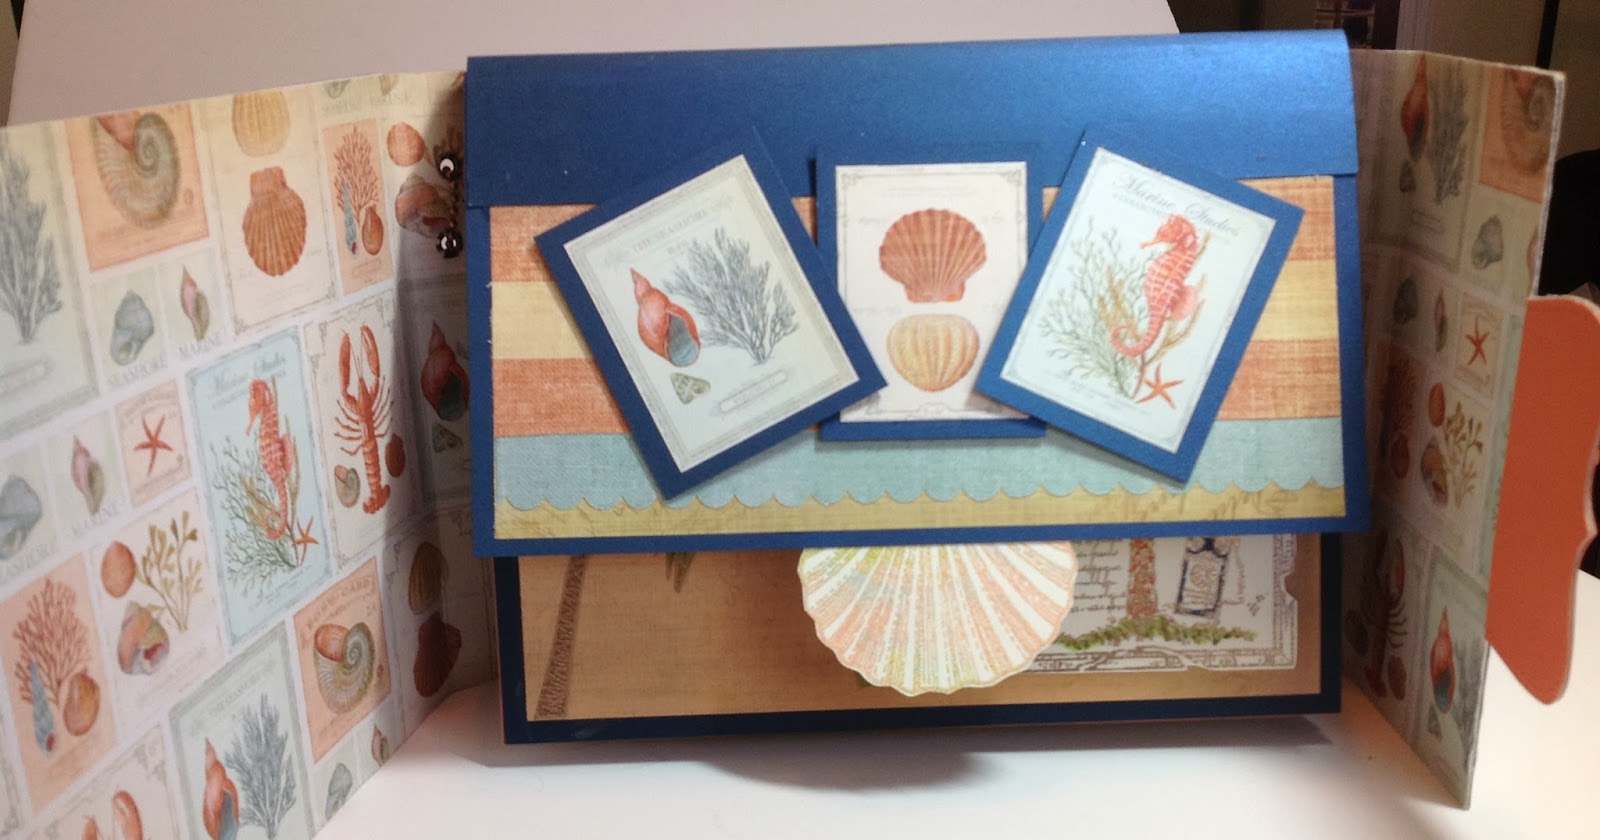
Here's the cover.... it has a magnet closure.


I added a band of CS to the top of the pages to give it a more clean look.
 
 
This is a view when the cover is opened.

 
The pull-tab is a stamped & embossed image of
a scallop shell from my collection.
The stamp is from Stampa Tampa (1995)
It was embossed using the "batik embossing" technique
and embossing powders from SNS's Cosmic Collection.

 
My "corner" pocket was created using a stamp from
Stamper's Anonymous, embossed with Antiquities
again from SNS.  The various other palm trees were from
Under the Rubber Tree, Viva Las Vegas &
Rubber Stamps of America.

 
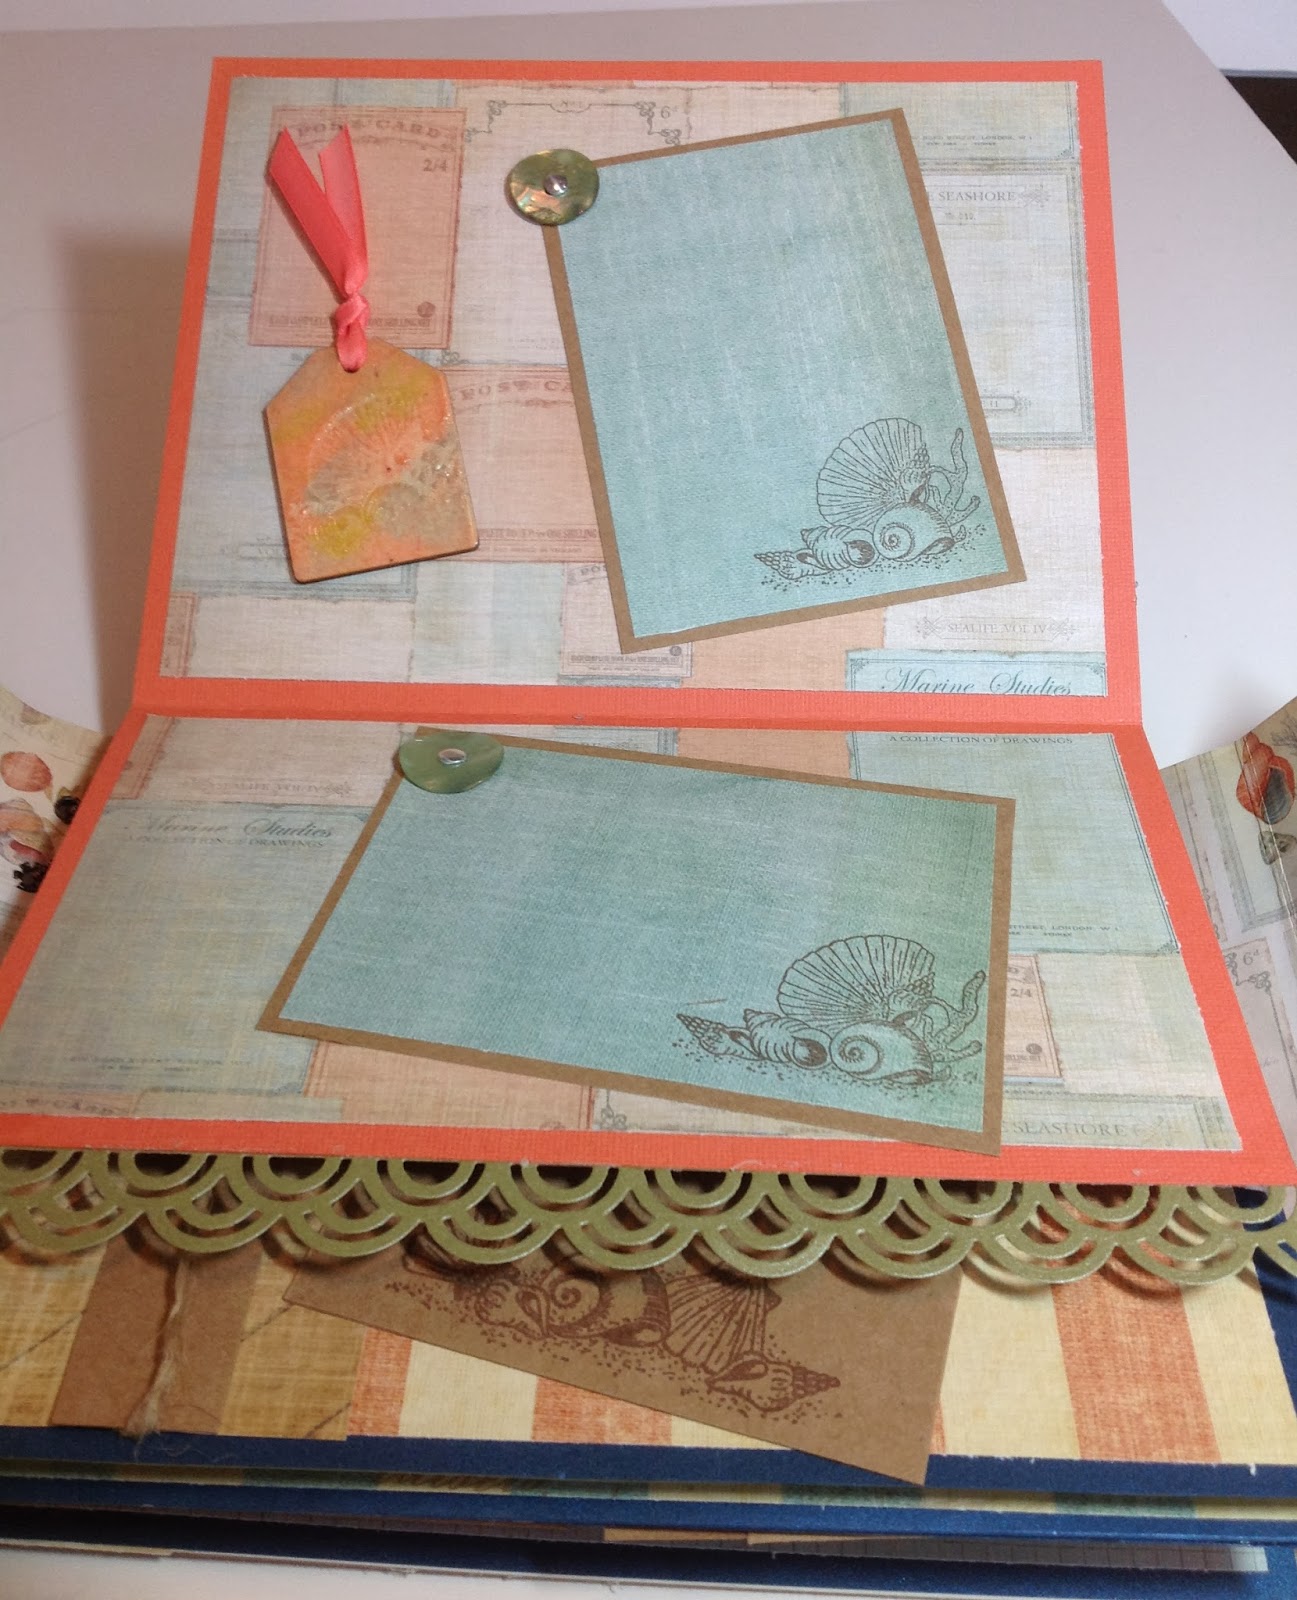
The stamp image on this page was from
Me & Carrie Lou and the buttons were
kind of cool - shell-looking from my collection.
The tag was wood and embossed using the Cosmic EPs
from SNS and overlayed with Magic Speckle and
stamped using the stamp image as on the panels.
Ribbon from May Arts.
The scalloped border is Spellbinders.

 
Here's a close-up of the tag and button.
 
 
The small palm tree embellie on this page was
created with another wooden piece and embossed
the same as the tag above.

 
Here's a close-up - the palm tree was stamped
while it was still molten and the stamp was inked in black.

 
Bling by Zva Creatives and the palm tree
images are by Rubber Stamps of America
and Viva Las Vegas.

 
Buttons from SU and the image
from Viva Las Vegas.

 
Shell tab is the same as the previous tab, but
with the addition of the button embellie.
The image on the pocket is another by
Me & Carrie Lou....   Oval punch and
scalloped border from SU and tab punch by
We Are Memory Keepers.

 
Here's a close-up of the shell tab.


Close-up of the pocket.

 
Close-up of the inserts.  Palm tree images by
Rubber Stamps of America & Stamps in Motion (1996).
I think this turned out to be my favorite page...
just love the color combo.

 
The last page....
 
 
Hope you enjoyed a day at the beach.


Wednesday, February 13, 2013

Sparkle N Sprinkle Monochromatic Blog Hop


Welcome to the Sparkle N Sprinkle Monochromatic Blog Hop!!!

If you arrived here by way of Karin Martin, then you're in the right place.  If not, you may want to start back at the beginning at the Sparkle N Sprinkle Blog to make sure you don't miss out on any of the fabulous prizes!
You must comment on each and every blog to be eligible.
Several of the prizes are "hidden" on various designer blogs.

I decided to use Set 477 - Serena Mermaid for my hop card.  
Instead of doing the traditional "sea" colors of blue, I decided to go with green.  My jumping off point was this fun green, sparkly mesh that I found at Scrapbook Expo in Anaheim at Mon Ami Gabi.
It was a great fit with Sparkle N Sprinkle's  Velvet Glitter - Luau Green.  I used the Luau Green as an accent on Serena after coloring her with my Copic markers and also on Super Adhesive Sheets to make the glittery green band under the image and the frilly leaves poking up on the green mesh.   The leaves were die cuts from Spellbinder's Foliage 2 set.  The Velvet Glitters are just awesome on the Super Adhesive Sheets and the Tear-ific Tape!  I also used my old standby, Sparkling Snow Glitter on her hair and body.


In addition to the funky mesh, I used a braided green ribbon (May Arts) in pieces sticking up like sea grass and then added some ribbon roses (May Arts).

    
Hope you enjoyed my monochromatic endeavor and the hop.
I'm the end of the line - hope you were inspired by our awesome design team!
Don't forget - make sure you comment on everyone's post to be eligible for prizes.  Prizes will be posted on the SNS Blog on Saturday - be sure to check back to see if you won!

Here's the hop rotation in case you missed anyone.

Brenda Smalle www.rubberroomantics.blogspot.com   (that's me)      

Happy Valentine's Day to everyone!
Don't eat too much chocolate :)
   
x_3c0269f7 photo x_3c0269f7.gif">
Related Posts Plugin for WordPress, Blogger...
Blogging tips